最近在学习怎么用 Shazzam Shader Editor 编写自定义的 Effect,并试着去实现阴影、内阴影和长阴影的效果。结果我第一步就放弃了,因为阴影用到的高斯模糊算法对我来说太太太太太太太太难了,最后只好用些投机取巧的方法来模仿这几种效果。
WPF 中的 DropShadowEffect 简单来说就是将输入源的图像进行高斯模糊,然后根据 Color、Opacity、Direction、ShadowDepth 这几个属性来修改颜色、透明度和位移,形成一张新的图像作为阴影,平铺在原图像的背后。要自己实现 DropShadowEffect 最大的难点就在高斯模糊这里,既然写不出高斯模糊算法,就只好依赖 WPF 现有的东西。我的做法是用一个 VisualBrush 获取需要做阴影的图像,然后再用 WPF 的 BlurEffect 让它变模糊:
<Grid ClipToBounds="True"> <Grid> <Grid.Effect> <BlurEffect Radius="38" /> </Grid.Effect> <Grid.Background> <VisualBrush Stretch="None" Visual="{Binding ElementName=ForegroundElement}" /> </Grid.Background> </Grid></Grid><Grid x:Name="ForegroundElement"> <TextBlock VerticalAlignment="Center" FontFamily="Lucida Handwriting" FontSize="148" FontWeight="ExtraBold" Foreground="#f7e681" TextAlignment="Center"> FAKE<LineBreak /> SHADOW</TextBlock></Grid>现在的它看起来就是这个样子。

然后写一个 FakeDropShadowEffect。它获取输入源的 Alpha 通道,将 RGB 替换为指定的颜色(默认是黑色),组合成新的颜色。再通过 Angle 和 Depth 计算出偏移:
float4 main(float2 uv : TEXCOORD) : COLOR{ float4 c = 0; float rad = Angle * 0.0174533f; float xOffset = cos(rad) * Depth; float yOffset = sin(rad) * Depth; uv.x += xOffset; uv.y += yOffset; c = tex2D(Texture1Sampler, uv); c.rgb = Color.rgb * c.a * Opacity; c.a = c.a * Opacity; return c;}最后在应用了 BlurEffect 的元素外面再套一层 Grid,然后在这个 Grid 应用刚刚写的 FakeDrpShadowEffect:
<Grid ClipToBounds="True"> <Grid.Effect> <effects:FakeDropShadowEffect Angle="225" Depth="0.03" Opacity="0.5" /> </Grid.Effect>
成果如上图所示,和 DropShadowEffect 几乎一样了。
关于内阴影的实现,我之前写过另一篇文章介绍过:实现 WPF 的 Inner Shadow。现在用 Effect,我首先想到的做法是叠加两个元素,上层的元素根据另一个元素的 VisualBrush 剪切出一个洞,然后在这个洞投下阴影:
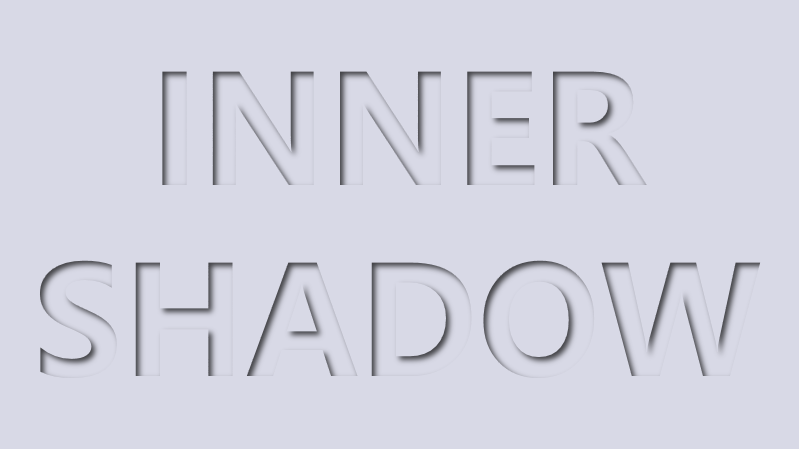
<Grid x:Name="BackgroundElement"> <TextBlock x:Name="Text" HorizontalAlignment="Center" VerticalAlignment="Center" FontSize="150" FontWeight="Bold" Foreground="{StaticResource LightBackground}" TextAlignment="Center"> INNER<LineBreak /> SHADOW</TextBlock></Grid><Grid ClipToBounds="True"> <Grid.Effect> <DropShadowEffect BlurRadius="8" Opacity="0.7" ShadowDepth="5" /> </Grid.Effect> <Grid Background="{StaticResource LightBackground}"> <Grid.Effect> <effects:ClipEffect> <effects:ClipEffect.Blend> <VisualBrush Stretch="None" Visual="{Binding ElementName=BackgroundElement}" /> </effects:ClipEffect.Blend> </effects:ClipEffect> </Grid.Effect> </Grid></Grid>在上面的 XAML 中,ClipEffect 有另一个输入 Blend,这个输入就是要剪切的形状。ClipEffect 的代码很简单,就只是几行,关键的功能是用 input 的Alpha 通道减去 blend 的 Alpha 通道作为结果输出:
sampler2D blend : register(s1);float4 main(float2 uv : TEXCOORD) : COLOR{ float4 inputColor = tex2D(input, uv); float4 blendColor = tex2D(blend, uv); float4 resultColor = 0; float opacity = inputColor.a - blendColor.a; resultColor.rgb = inputColor.rgb * opacity; resultColor.a = opacity; return resultColor;}下图是上面的 XAML 实现的效果:
我以前写过一篇在 UWP 实现长阴影的博客:使用GetAlphaMask和ContainerVisual制作长阴影(Long Shadow) 。这次在 WPF 里重新用 Effect 实现一次。长阴影的原理是不断向左上角(因为偷懒就只是做向右下的阴影)检查,直到遇到 Alpha 通道为 1 的像素,然后计算这个像素与自身的距离得出阴影的 Alpha,所有代码如下:
float4 main(float2 uv : TEXCOORD) : COLOR{ float4 srcColor = tex2D(input, uv); if (srcColor.a == 1) { return srcColor; } float4 tempColor = 0; float2 offset = 0; int maxDepth = 400; float a = 0; for (float i = 1; i < maxDepth; i++) { if (i < ShadowLength) { if (a == 0) { offset = uv.xy - float2(i / Width, i / Height); if (offset.x > 0 && offset.y > 0) { tempColor = tex2D(input, offset); if (tempColor.a == 1) { a = (1 - i / max(1,ShadowLength)); } } } } } if (a == 0) { return srcColor; } a = min(1,a); tempColor.rgb = Color.rgb * a * Opacity; tempColor.a = a * Opacity; float4 outColor = (1 - srcColor.a) * tempColor + srcColor; return outColor;}使用起来的 XAML 和效果如下,需要输入 ShadowLength 和 Color,因为 Effect 没法知道输入源的尺寸,所以还需要主动输入 Width 和 Height:
<Grid x:Name="Root" Background="Transparent"> <Grid.Effect> <effects:LongShadowEffect Width="{Binding ElementName=Root, Path=ActualWidth}" Height="{Binding ElementName=Root, Path=ActualHeight} ShadowLength="100" Color="Red" /> </Grid.Effect> <TextBlock x:Name="TextBlock" HorizontalAlignment="Center" VerticalAlignment="Center" FontSize="150" FontWeight="Bold" Text="NEXT" /></Grid>
https://github.com/DinoChan/wpf_design_and_animation_lab