转载自:www.javaman.cn 手撸一个springsecurity,了解一下security原理
今天手撸一个简易版本的springsecurity,带大家理解下springsecurity的原理:
认证就是指需要登录才能进行系统操作,如:登录qq、微信或者是web系统的登录都是认证的过程
1.1 工程目录
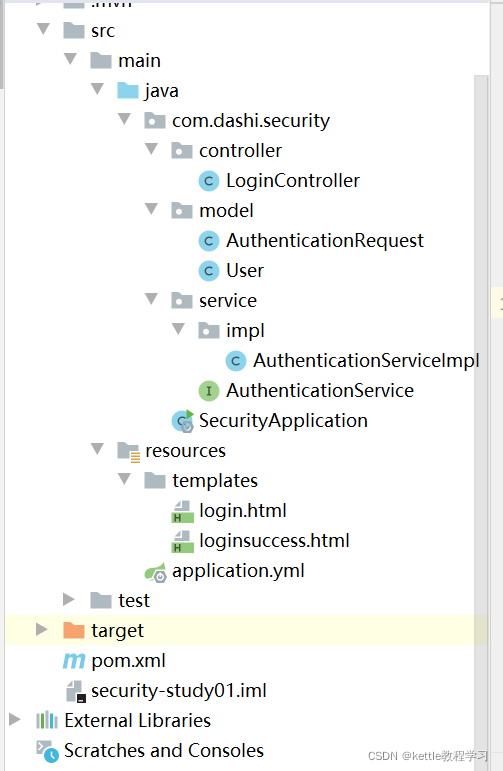
1.2 maven配置pom.xml
<?xml version="1.0" encoding="UTF-8"?><project xmlns="http://maven.apache.org/POM/4.0.0" xmlns:xsi="http://www.w3.org/2001/XMLSchema-instance" xsi:schemaLocation="http://maven.apache.org/POM/4.0.0 https://maven.apache.org/xsd/maven-4.0.0.xsd"> <modelVersion>4.0.0</modelVersion> <parent> <groupId>org.springframework.boot</groupId> <artifactId>spring-boot-starter-parent</artifactId> <version>2.6.3</version> <relativePath/> <!-- lookup parent from repository --> </parent> <groupId>com.dashi</groupId> <artifactId>security</artifactId> <version>0.0.1-SNAPSHOT</version> <name>security</name> <description>Demo project for Spring Boot</description> <properties> <java.version>1.8</java.version> </properties> <dependencies> <dependency> <groupId>org.springframework.boot</groupId> <artifactId>spring-boot-starter</artifactId> </dependency> <dependency> <groupId>org.springframework.boot</groupId> <artifactId>spring-boot-starter-web</artifactId> </dependency> <dependency> <groupId>org.springframework.boot</groupId> <artifactId>spring-boot-starter-thymeleaf</artifactId> </dependency> <dependency> <groupId>org.projectlombok</groupId> <artifactId>lombok</artifactId> <optional>true</optional> </dependency> <dependency> <groupId>org.springframework.boot</groupId> <artifactId>spring-boot-starter-test</artifactId> <scope>test</scope> </dependency> </dependencies> <build> <plugins> <plugin> <groupId>org.springframework.boot</groupId> <artifactId>spring-boot-maven-plugin</artifactId> <configuration> <excludes> <exclude> <groupId>org.projectlombok</groupId> <artifactId>lombok</artifactId> </exclude> </excludes> </configuration> </plugin> </plugins> </build></project>1.3 application.yml
spring: mvc: view: prefix: / suffix: .html1.4 创建User,模拟springsecurity的用户信息的核心接口UserDetails
import lombok.AllArgsConstructor;import lombok.Data;@Data@AllArgsConstructorpublic class User { private Integer id; private String username; private String password;}1.5 创建AuthenticationService,模拟springsecurity的UserDetailsService核心接口
public interface AuthenticationService { public User authentication(AuthenticationRequest authenticationRequest);}1.6 实现AuthenticationService,模拟实现UserDetailsService的过程
@Servicepublic class AuthenticationServiceImpl implements AuthenticationService { private Map<String,User> users = new HashMap<String,User>(); @Override public User authentication(AuthenticationRequest authenticationRequest) { if(authenticationRequest == null||"".equals(authenticationRequest.getUsername())||"".equals(authenticationRequest.getPassword())){ throw new RuntimeException("用户名或密码为空"); } User user = users.get(authenticationRequest.getUsername()); if(user == null){ throw new RuntimeException("用户不存在"); } if(!user.getPassword().equals(authenticationRequest.getPassword())){ throw new RuntimeException("密码不正确"); } return user; //模拟实现UserDetailS的User } public User getUser(String username){ return users.get(username); } //创建两个账户,模拟管理员和普通的来宾用户 { users.put("admin",new User(1,"admin","123")); //管理员 users.put("guest",new User(2,"guest","111")); //来宾账户 }}1.7 接收请求参数封装对象
@Datapublic class AuthenticationRequest { private String username; private String password;}1.8 登录Controller,对/login请求处理,它调用AuthenticationService完成认证并返回登录结果提示信息
@Controllerpublic class LoginController { @Autowired private AuthenticationService authenticationService; @GetMapping("/login") public String login(){ return "login"; } @PostMapping(value = "/login",produces = {"text/plain;charset=UTF-8"}) public String login(AuthenticationRequest authenticationRequest, Model model){ System.out.println("111"+authenticationRequest); User user = authenticationService.authentication(authenticationRequest); String loginMsg = user.getUsername()+"登录成功"; System.out.println(loginMsg); model.addAttribute("loginMsg",loginMsg); return "loginsuccess"; }}1.9 认证页面
<!DOCTYPE HTML PUBLIC "-//W3C//DTD HTML 4.01 Transitional//EN" "http://www.w3.org/TR/html4/loose.dtd"><html><head> <title>登录</title></head><body><form action="/login" method="post"> 用户名:<input type="text" name="username"><br> 密码:<input type="password" name="password"><br> <input type="submit" value="登录1"></form></body></html><!DOCTYPE HTML PUBLIC "-//W3C//DTD HTML 4.01 Transitional//EN" "http://www.w3.org/TR/html4/loose.dtd"><html lang="en" xmlns:th="http://www.thymeleaf.org"><head> <title>Title</title></head><body> <h1 th:text="${loginMsg}"></h1></body></html>1.10 认证成功后打印登录成功
1)登录界面如下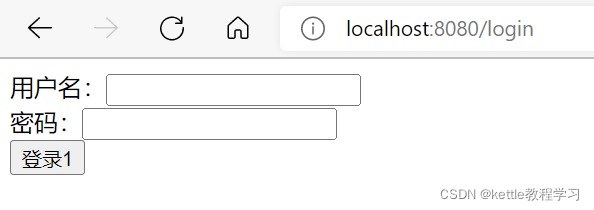
2)密码错误界面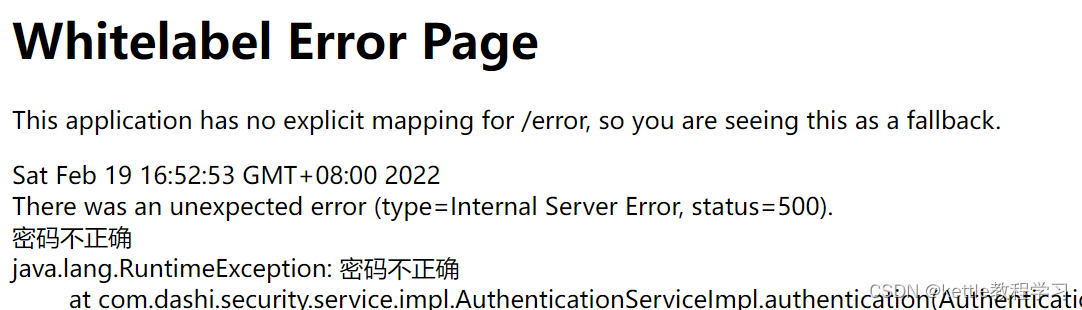
3)登录成功界面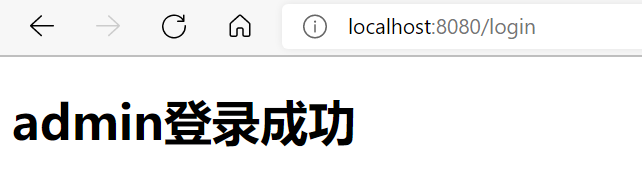
授权就是控制什么样的用户或者角色访问什么功能,例如:管理员可以访问全部功能,guest普通用户只能访问某一个菜单或者功能
2.1 User增加权限authorities和session
package com.dashi.security.model;import lombok.AllArgsConstructor;import lombok.Data;import java.util.Set;@Data@AllArgsConstructorpublic class User { private Integer id; private String username; private String password; //登录用户,增加登录用户session public static final String LOGIN_USER = "user"; /** * 用户权限 */ private Set<String> authorities;}2.2 用户增加角色authorities
import com.dashi.security.model.AuthenticationRequest;import com.dashi.security.model.User;import com.dashi.security.service.AuthenticationService;import org.springframework.stereotype.Service;import org.springframework.util.StringUtils;import java.util.HashMap;import java.util.HashSet;import java.util.Map;import java.util.Set;@Servicepublic class AuthenticationServiceImpl implements AuthenticationService { private Map<String,User> users = new HashMap<String,User>(); @Override public User authentication(AuthenticationRequest authenticationRequest) { if(authenticationRequest == null||"".equals(authenticationRequest.getUsername())||"".equals(authenticationRequest.getPassword())){ throw new RuntimeException("用户名或密码为空"); } User user = users.get(authenticationRequest.getUsername()); if(user == null){ throw new RuntimeException("用户不存在"); } if(!user.getPassword().equals(authenticationRequest.getPassword())){ throw new RuntimeException("密码不正确"); } return user; } public User getUser(String username){ return users.get(username); } { //增加管理员权限 Set<String> authorities1 = new HashSet<>(); authorities1.add("admin"); //增加来宾权限 Set<String> authorities2 = new HashSet<>(); authorities2.add("guest"); users.put("admin",new User(1,"admin","123",authorities1)); users.put("guest",new User(2,"guest","111",authorities2)); }}2.3登录成功后,将用户放到session中
import com.dashi.security.model.AuthenticationRequest;import com.dashi.security.model.User;import com.dashi.security.service.AuthenticationService;import org.springframework.beans.factory.annotation.Autowired;import org.springframework.stereotype.Controller;import org.springframework.ui.Model;import org.springframework.web.bind.annotation.GetMapping;import org.springframework.web.bind.annotation.ModelAttribute;import org.springframework.web.bind.annotation.PostMapping;import org.springframework.web.servlet.ModelAndView;import javax.servlet.http.HttpSession;@Controllerpublic class LoginController { @Autowired private AuthenticationService authenticationService; @GetMapping("/login") public String login(){ return "login"; } @PostMapping(value = "/login",produces = {"text/plain;charset=UTF-8"}) public String login(AuthenticationRequest authenticationRequest, Model model, HttpSession session){ System.out.println("111"+authenticationRequest); User user = authenticationService.authentication(authenticationRequest); session.setAttribute(User.LOGIN_USER,user); String loginMsg = user.getUsername()+"登录成功"; System.out.println(loginMsg); model.addAttribute("loginMsg",loginMsg); return "loginsuccess"; }}2.4 增加Springboot拦截器配置,判断是admin用户,可以访问所有资源resource1和resource2,如果是guest用户只允许访问resource2资源
import com.dashi.security.model.User;import org.springframework.stereotype.Component;import org.springframework.web.servlet.HandlerInterceptor;import javax.servlet.http.HttpServletRequest;import javax.servlet.http.HttpServletResponse;import java.io.IOException;import java.io.PrintWriter;@Componentpublic class MyAuthenInterceptor implements HandlerInterceptor { @Override public boolean preHandle(HttpServletRequest request, HttpServletResponse response, Object handler) throws Exception { Object object = request.getSession().getAttribute(User.LOGIN_USER); System.out.println("object = " + object); if(object == null){ writeContent(response,"请登录"); } //获取请求的url String requestURI = request.getRequestURI(); User user = (User)object; if(user.getAuthorities().contains("admin") && requestURI.contains("/resource1") || requestURI.contains("/resource2")){ writeContent(response,user.getUsername()+"访问:"+requestURI+"访问成功!"); return true; } if(user.getAuthorities().contains("guest") && requestURI.contains("/resource2")){ writeContent(response,user.getUsername()+"访问:"+requestURI+"访问成功!"); return true; } writeContent(response,"权限不足!"); return false; } private void writeContent(HttpServletResponse response,String msg) throws IOException { response.setContentType("text/html;charset=utf-8"); PrintWriter printWriter = response.getWriter(); printWriter.write(msg); printWriter.close(); response.resetBuffer(); }}2.5 拦截器进行请求拦截,拦截/resource/**请求
import org.springframework.beans.factory.annotation.Autowired;import org.springframework.context.annotation.Configuration;import org.springframework.web.servlet.config.annotation.InterceptorRegistry;import org.springframework.web.servlet.config.annotation.WebMvcConfigurer;@Configurationpublic class LoginConfig implements WebMvcConfigurer { @Autowired private MyAuthenInterceptor myAuthenInterceptor; public void addInterceptors(InterceptorRegistry registry){ registry.addInterceptor(myAuthenInterceptor).addPathPatterns("/resource/**"); }}2.6 授权测试界面如下:
1)登录成功后设置resource1和resource2访问功能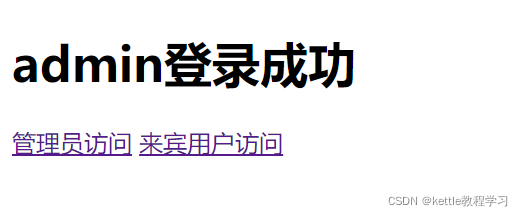
2)admin用户访问资源1和资源2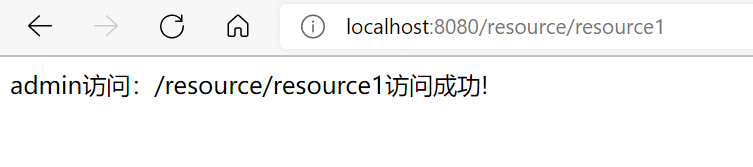

3)guest用户只能访问资源2,不能访问资源1

2.7 实现了springsecurity的认证和授权
1、 认证功能:
loginPage("/login.html")即为认证
2、 授权功能:
.antMatchers("/resource/resource1").hasAuthority(“admin”)
.antMatchers("/resource/resource2").hasAuthority(“admin”)
.antMatchers("/resource/resource2").hasAuthority(“guest”)
@Override protected void configure(HttpSecurity http) throws Exception { //以下五步是表单登录进行身份认证最简单的登录环境 http.formLogin() //表单登陆 .loginPage("/login.html") //指定登陆页面 .loginProcessingUrl("/authentication/form")//登陆页面提交的页面 开始使用UsernamePasswordAuthenticationFilter过滤器处理请求 .and() // .authorizeRequests() //下面的都是授权的配置 .antMatchers("/resource/resource1").hasAuthority("admin") .antMatchers("/resource/resource2").hasAuthority("admin") .antMatchers("/resource/resource2").hasAuthority("guest") .and() .csrf().disable();//关闭跨站请求伪造攻击拦截